Managing Status Groups: Difference between revisions
Jump to navigation
Jump to search
No edit summary Tag: Reverted |
No edit summary Tag: Manual revert |
||
| Line 1: | Line 1: | ||
After you accessed the admin area of your website click on '''Settings''', '''Orders Status''' and '''Status Groups''' tabs. | After you accessed the admin area of your website click on '''Settings''', '''Orders Status''' and '''Status Groups''' tabs. | ||
Revision as of 19:00, 24 February 2023
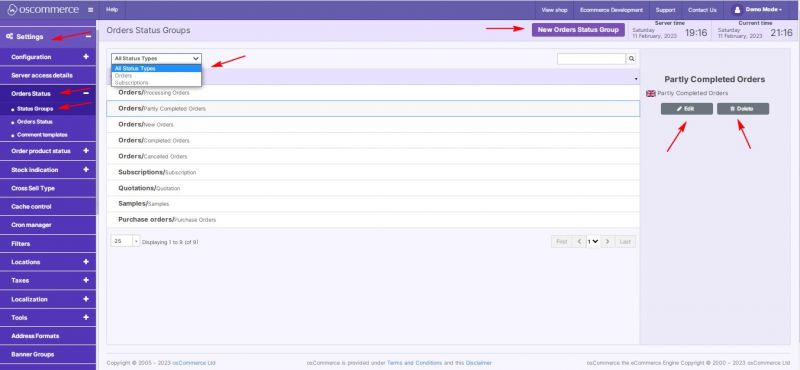
After you accessed the admin area of your website click on Settings, Orders Status and Status Groups tabs.
Using drop down it is possible to filter status groups by status type.
You can add a new status group, edit or delete the existing ones by clicking on the corresponding buttons.
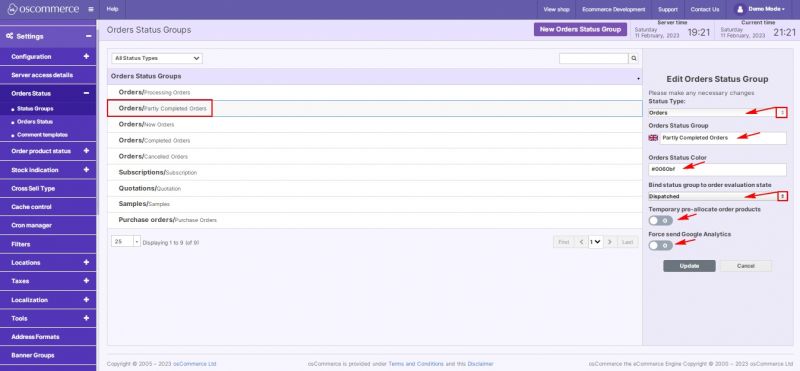
While adding or editing a status group it is possible to:
- set status type (order or subscription)
- set group name
- set status color
- bind status group to order evaluation state:
- Pending
- Processing
- Received
- Dispatched
- Delivered
- Canceled
- Part Canceled
- temporarily pre-allocate order products (yes/no)
- force send Google Analytics (yes/no)

