Managing Zero Price Module
The Zero Price module provides a seamless way to enhance your product offerings by replacing zero prices with the term "Free." This guide offers a comprehensive walkthrough for installing, configuring, and effectively utilizing the Zero Price module within your website's admin area.
Installation:
- Begin by logging into the admin area of your website.
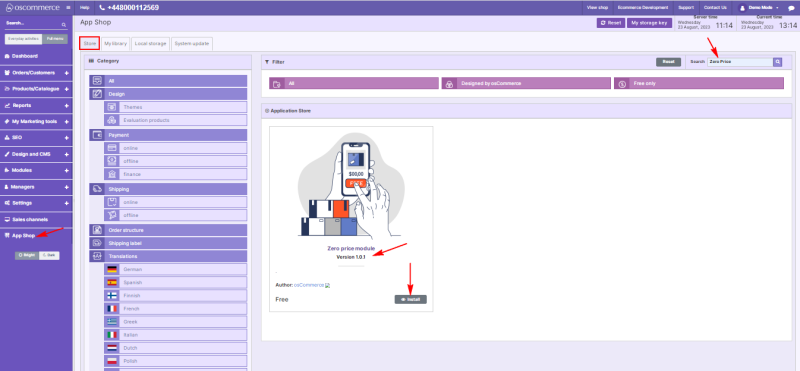
- Locate and access the App Shop and Store tabs within the admin panel.
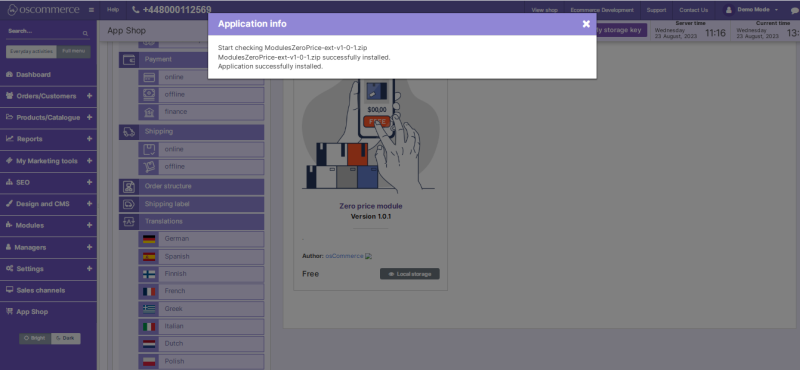
- Employ the search function to find the Zero Price module (version 1.0.1). Once located, proceed to install the module on your website by following the provided on-screen prompts and instructions.
Configuration:
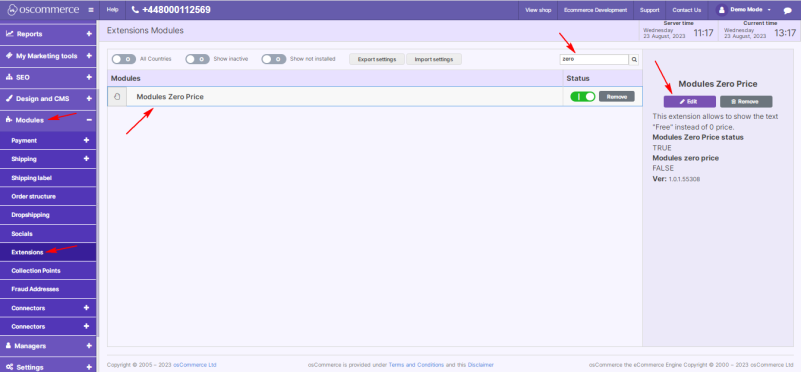
- Following a successful installation, navigate to the Modules and Extensions tabs situated in the admin area.
- Locate the "Zero Price" module within the list and click on the "Edit" button to access its configuration settings.
Settings:
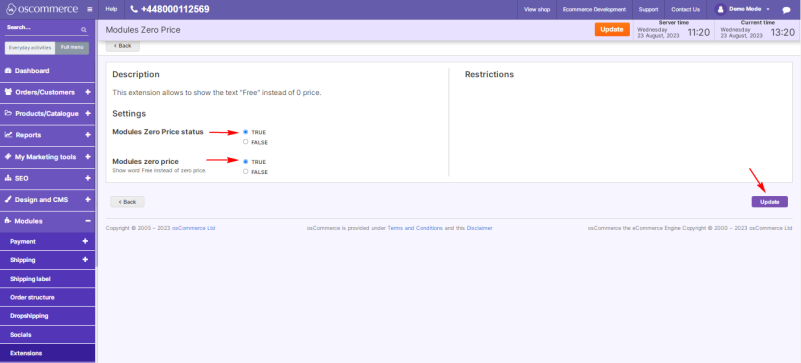
- Within the "Settings" section, activate the toggle option to enable the Zero Price module for your website.
- Toggle the option to display the word "Free" instead of a zero price.
- Confirm and save your configuration changes by clicking the "Update" button.
Assigning Zero Price:
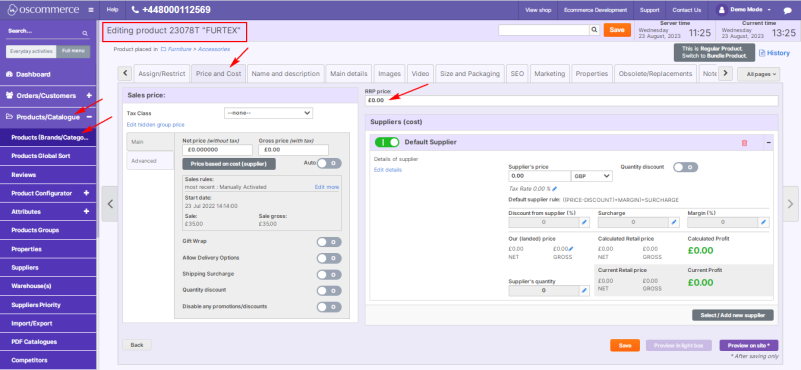
- Navigate to the Products/Catalogue and Products tabs.
- Select the desired product.
- Assign a price of 0 to the product.
Front End Display:
Upon assigning a zero price, on the front end, in the order summary section, you will notice the term "Free" replacing the zero value for both sub-total and total sum values.
Congratulations! You've effectively integrated and enabled the Zero Price module, enhancing your product presentation by displaying "Free" for zero-priced items. For further inquiries, consult the documentation provided with the module.
