Managing LiqPay Module
The LiqPay module allows you to integrate your website with the LiqPay payment system, enabling you to offer seamless payment options to your customers. This user guide will walk you through the process of installing and configuring the LiqPay module to suit your specific requirements.
1. Installation:
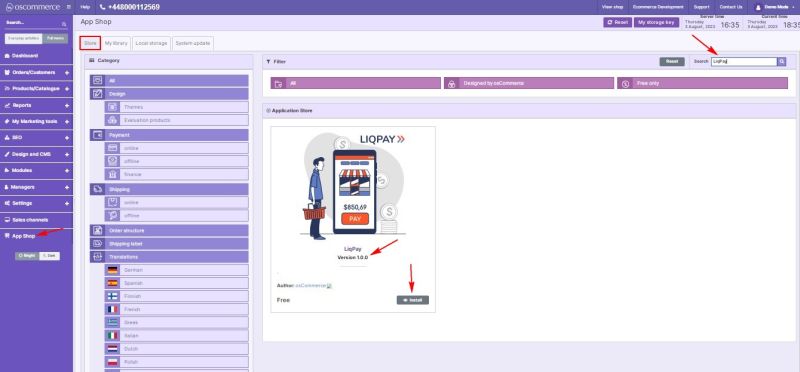
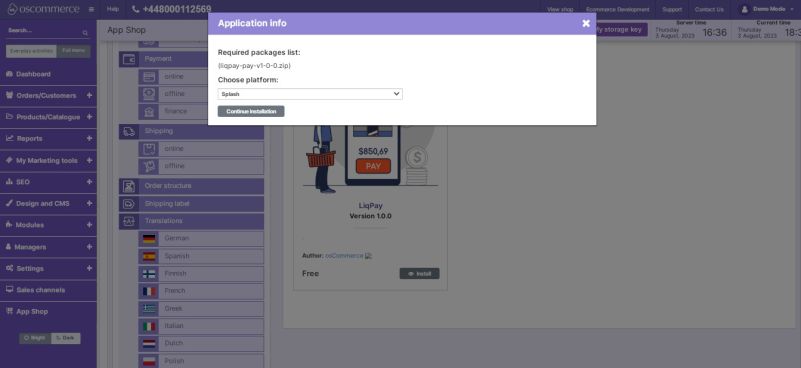
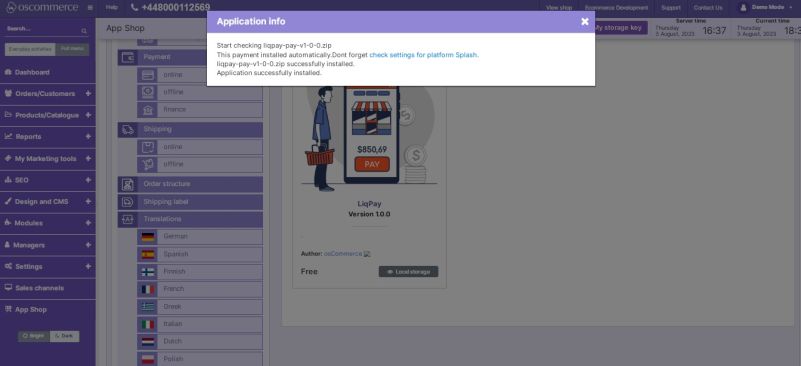
To begin, access the admin area of your website and navigate to the "App Shop" and "Store" tabs. Perform a quick search for the LiqPay module version 1.0.0, and proceed to install it on your website. Follow any on-screen prompts or instructions to complete the installation process smoothly.
2. Accessing the LiqPay Module Settings:
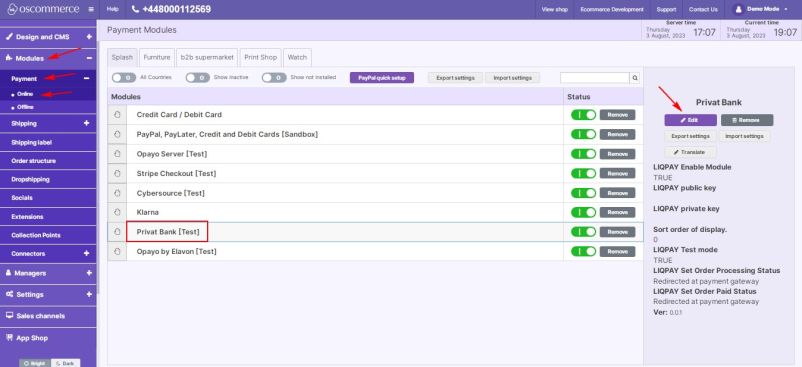
After successful installation, go to the "Modules," "Payment," and "Online" tabs within the admin area. Locate the "Privat Bank" module and click on the “Edit” button to access its settings for LiqPay.
3. Customizing Restrictions:
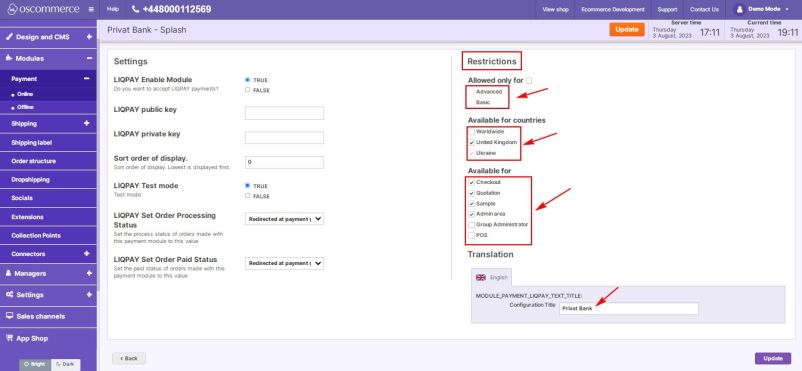
In the "Restrictions" section, tailor the LiqPay module to your specific needs. You can limit LiqPay to specific customer groups, countries, and website pages. Additionally, you have the option to specify the module name for both the backend and frontend in your desired language.
4. Configuring LiqPay Settings:
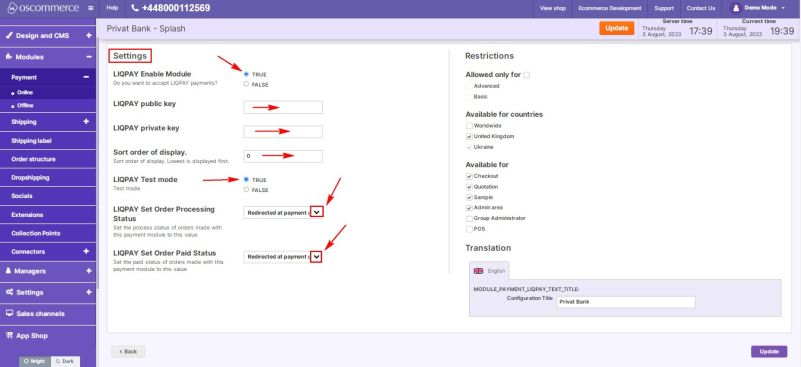
Move on to the "Settings" section to configure the LiqPay module options:
- Enable LiqPay: Toggle the option to enable the LiqPay module for your website.
- Enter LiqPay Public and Private Keys: Use the corresponding fields to enter your LiqPay public and private keys, which are essential for secure transactions.
- Payment Priority: Control the order in which payment options are displayed during checkout. Enter a value in the corresponding field to set the payment priority. Lower values will prioritize LiqPay over other payment methods.
- Enable Test Mode: If you want to test the LiqPay module before going live, enable the test mode. It allows you to ensure that everything works as expected without processing real transactions.
- Order Statuses: Set processing statuses and paid statuses for orders made with LiqPay module by choosing statuses from the drop-down lists. This helps you keep track of the payment status of your orders effectively.
Congratulations!
You have successfully integrated the LiqPay payment system with your website and customized its settings to meet your specific needs.
For any additional assistance or support, please refer to the documentation provided with the LiqPay module.
