Managing Klarna Module
Welcome to the user guide for managing the Klarna Module. This guide will assist you in seamlessly integrating your website with the Klarna payment service and configuring its settings to align with your business needs. Follow the steps below to successfully incorporate the module and enhance your payment options.
1. Installation Process
- Access the admin area of your website.
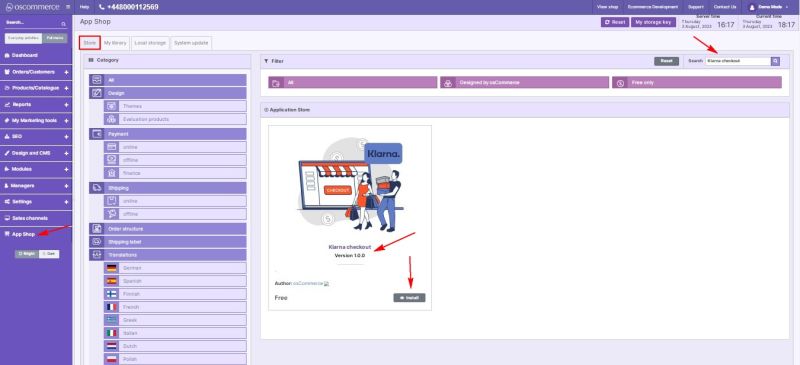
- Navigate to the "App Shop" and "Store" tabs.
- Find the Klarna module version 1.0.0 using the search function.
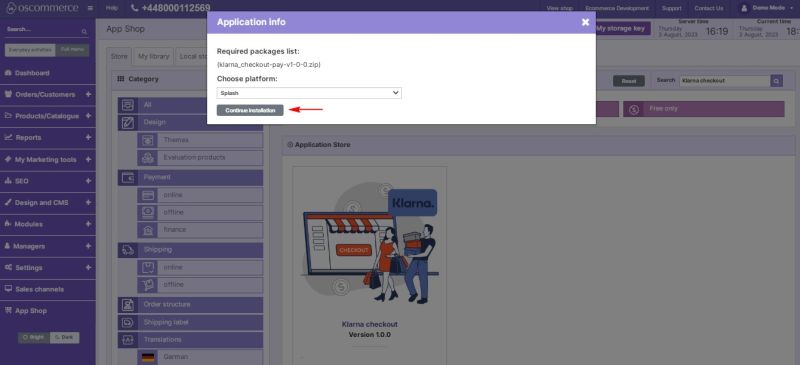
- Install the module on your website.
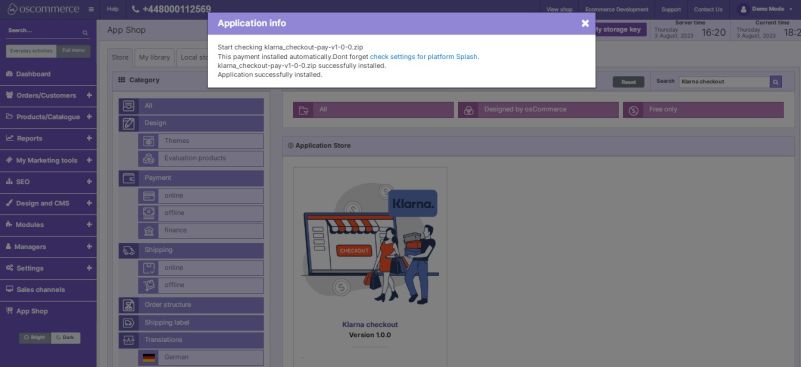
Follow any on-screen prompts or instructions to complete the installation process.
2. Configuring the Klarna Module
After successfully installing the Klarna Module, proceed to configure it to enable seamless integration with the Klarna payment service.
2.1. Accessing Module Settings
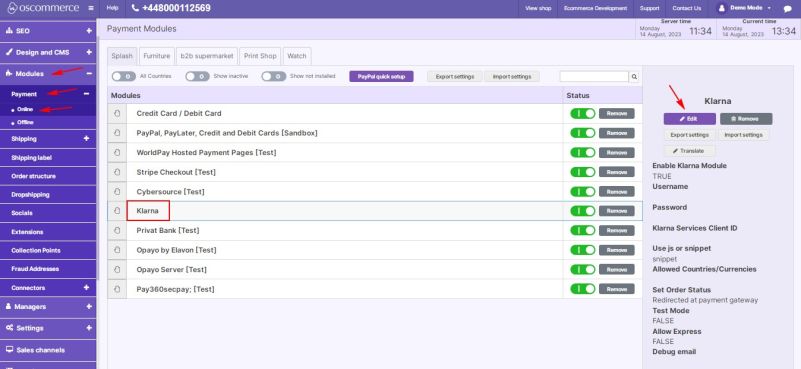
- Go to the "Modules," "Payment," and "Online" tabs.
- Locate the "Klarna" module.
- Click on the “Edit” button to access its settings.
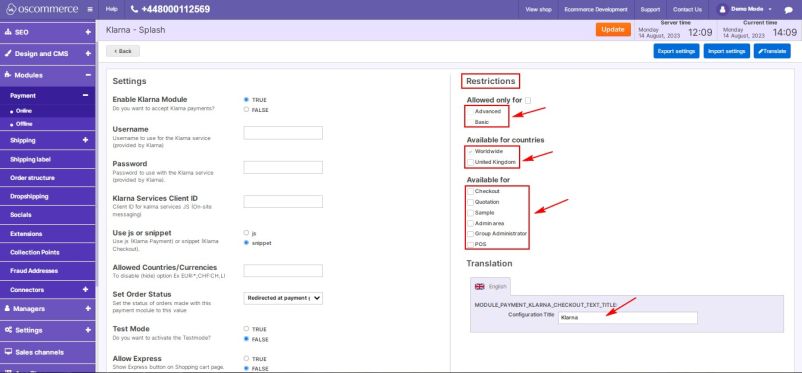
2.2. Restrictions Configuration
In the "Restrictions" section, tailor the Klarna module to your specific requirements.
- Restrict Klarna to specific customer groups, countries, and website pages.
- Specify the module name for both the backend and frontend in your desired language.
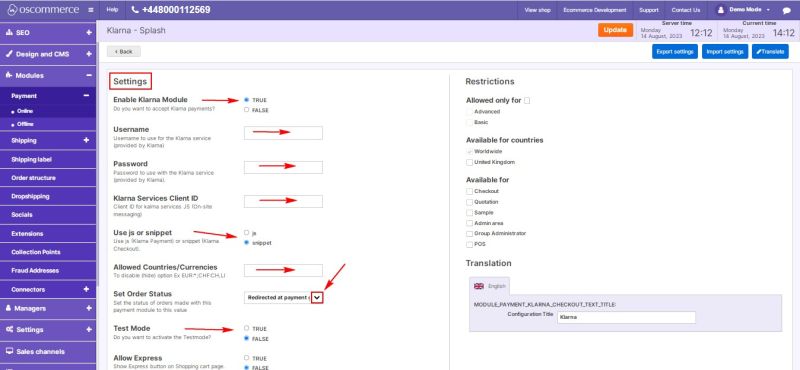
2.3. Settings Configuration
In the "Settings" section, configure the Klarna module options.
- Toggle the option to enable the Klarna module for your website.
- Enter the user name, password, and Klarna services client ID (provided by Klarna) for using the Klarna service.
- Choose whether to use js (for Klarna Payment) or snippet (for Klarna Checkout).
- Assign allowed countries and currencies.
- Set order statuses for orders made with Klarna by selecting statuses from the drop-down list.
- Enable test mode if you wish to conduct test transactions.
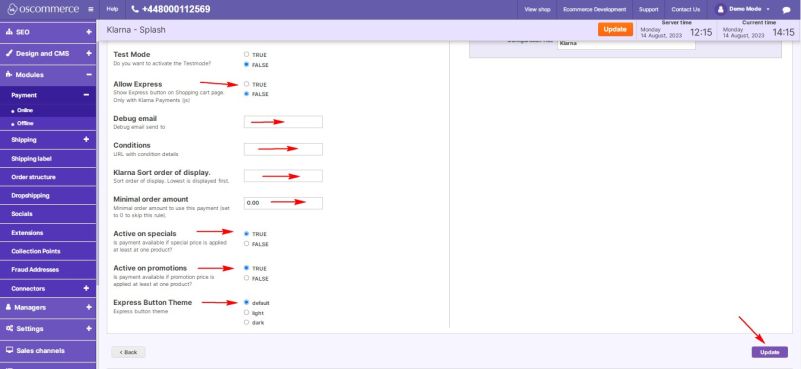
- Activate the Express button on the shopping cart page (only with Klarna Payments (js)).
- Enter the debug e-mail address for invalid transaction parameters.
- Set the link regarding the policy for this payment method in the Conditions field.
- Control the order in which payment options are displayed during checkout by entering a value in the corresponding field.
- Assign a minimum order amount for this payment method.
- Choose the "True" option to enable or disable this payment method for products with special and/or promotion prices.
- Configure the Express button theme (default, light, or dark).
- Click on the "Update" button to save your configuration.
Congratulations! You have successfully integrated the Klarna payment service with your website and customized its settings to align with your specific needs. For further assistance or support, please refer to the documentation provided with the Klarna module. Enjoy the benefits of enhanced payment options with the Klarna Module!
