
When it comes to efficiently managing your website's content, handling categories is a crucial aspect. Whether you're an experienced website administrator or just starting out, understanding the ins and outs of category management can greatly impact the user experience and overall organization of your online platform. In this guide, we'll walk you through the process of managing categories, making it easier than ever to navigate and showcase your products effectively.
|
Navigating to the Categories Section Once you've gained access to the admin area of your website, the key to managing categories lies within the "Products" or "Catalogue" section, often accompanied by "Brands" and "Categories" tabs. These tabs serve as your command center for maintaining a well-structured product hierarchy. Organizing Categories The "Categories" tab is where the magic happens. Here, you can effortlessly organize your categories using the intuitive drag-and-drop functionality. Whether it's arranging categories within a hierarchy or toggling their visibility, you have full control over how they appear to your users. |
.jpg) |
.jpg) |
Adding a New Category Expanding your category list is a breeze. Simply click on the designated button to create a new category. This empowers you to keep your offerings up-to-date and aligned with your business's evolving focus. |
|
While adding or editing a category, you can assign it to sale channels under the Assign/Restrict tab. You can also link a category to a specific customer group by enabling the "Assign" option in the adjacent column. |
.jpg) |
|
|
Fine-Tuning Category Details Delving into the finer details of each category, you'll find the "Name and Description" tab. Here, you can craft compelling category names, provide informative descriptions, add a banner to description, and even link relevant pages, products, or other categories. Keywords can also be assigned, enhancing searchability within your platform. |
|
Optimizing Display The "Main Details" tab offers a wealth of options to optimize category display. From adjusting the category's status and manual status state control to defining the default sort order for product listings, you can tailor the browsing experience for your users. Notably, you can individually set "Out of Stock" thresholds for each category and choose appropriate banner groups and sales channels, adding a personalized touch to your platform. See guide: Managing Default Sort Order on Product Listing and Category. |
.jpg) |
|
|
Enhancing Visual Appeal Visual content is paramount in today's digital landscape. The "Main Details" tab also empowers you to curate the visual aesthetics of your categories. From banners and gallery images to hero images and additional visuals, you can seamlessly incorporate images that resonate with your brand. These visuals not only beautify your category pages but can also be strategically placed on the homepage for maximum impact. If no image is uploaded, the system will use an image from a product within the corresponding category or subcategory. |
|
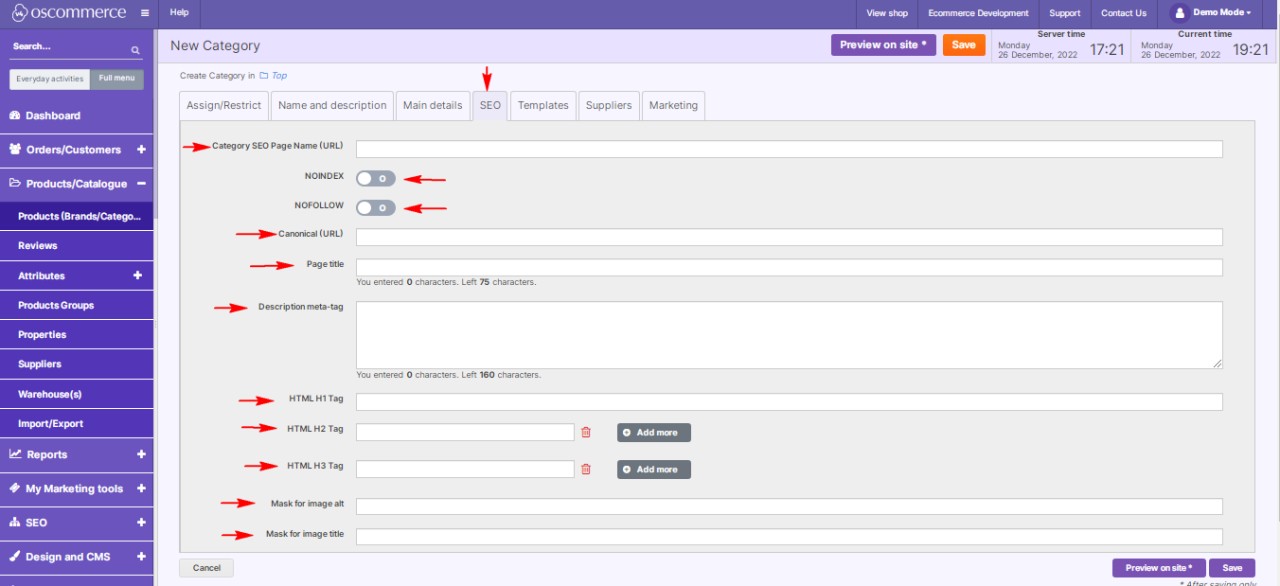
Boosting SEO To ensure your categories are discoverable, the "SEO" tab comes into play. This is where you can optimize various SEO properties such as URLs, meta descriptions, and title tags. By carefully crafting these elements, you'll enhance your website's visibility in search engines and attract more organic traffic. See guide: Managing SEO |
|
.jpg) |
Activating Filters Activate category filters under the "Filters" tab, allowing users to sort products based on keywords, prices, categories, and various product properties such as dimensions, colors, and more. Access the "View Values" link to see active values for each filter type. |
|
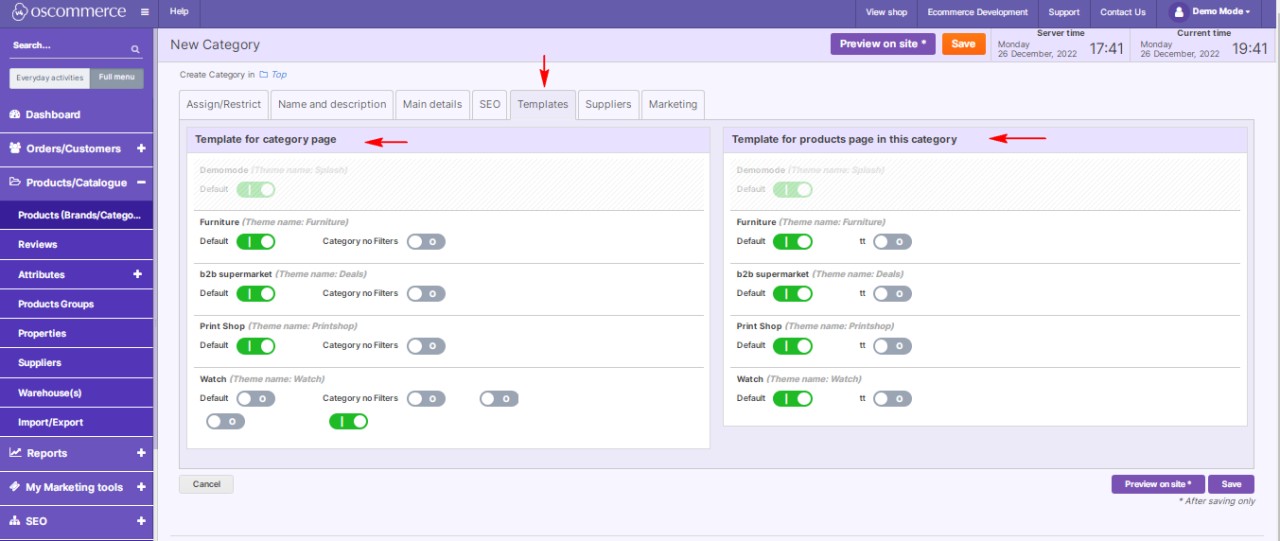
Tailoring Design Under the "Templates" tab, you can take customization a step further. Choose design templates that align with your brand's aesthetics for both the category page itself and the products within it. This consistency in design fosters a seamless browsing experience for your visitors. |
|
|
|
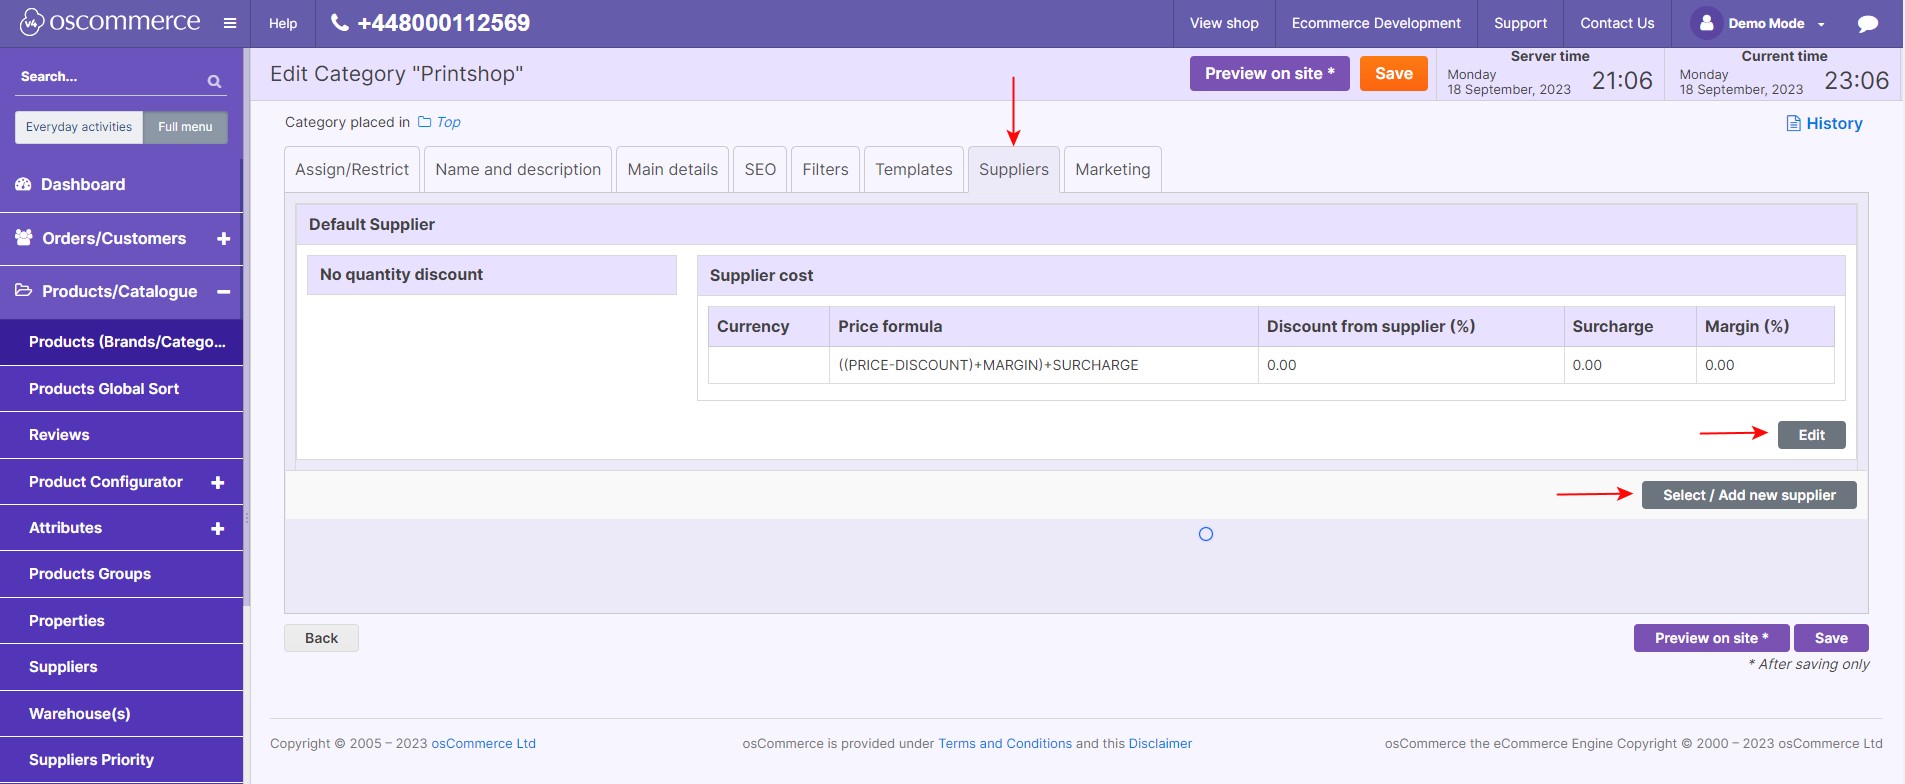
Forging Partnerships If supplier relationships are vital to your business, the "Suppliers" tab offers the ability to designate default suppliers for specific categories. Additionally, you can easily add or select new suppliers as your business network expands. |
|
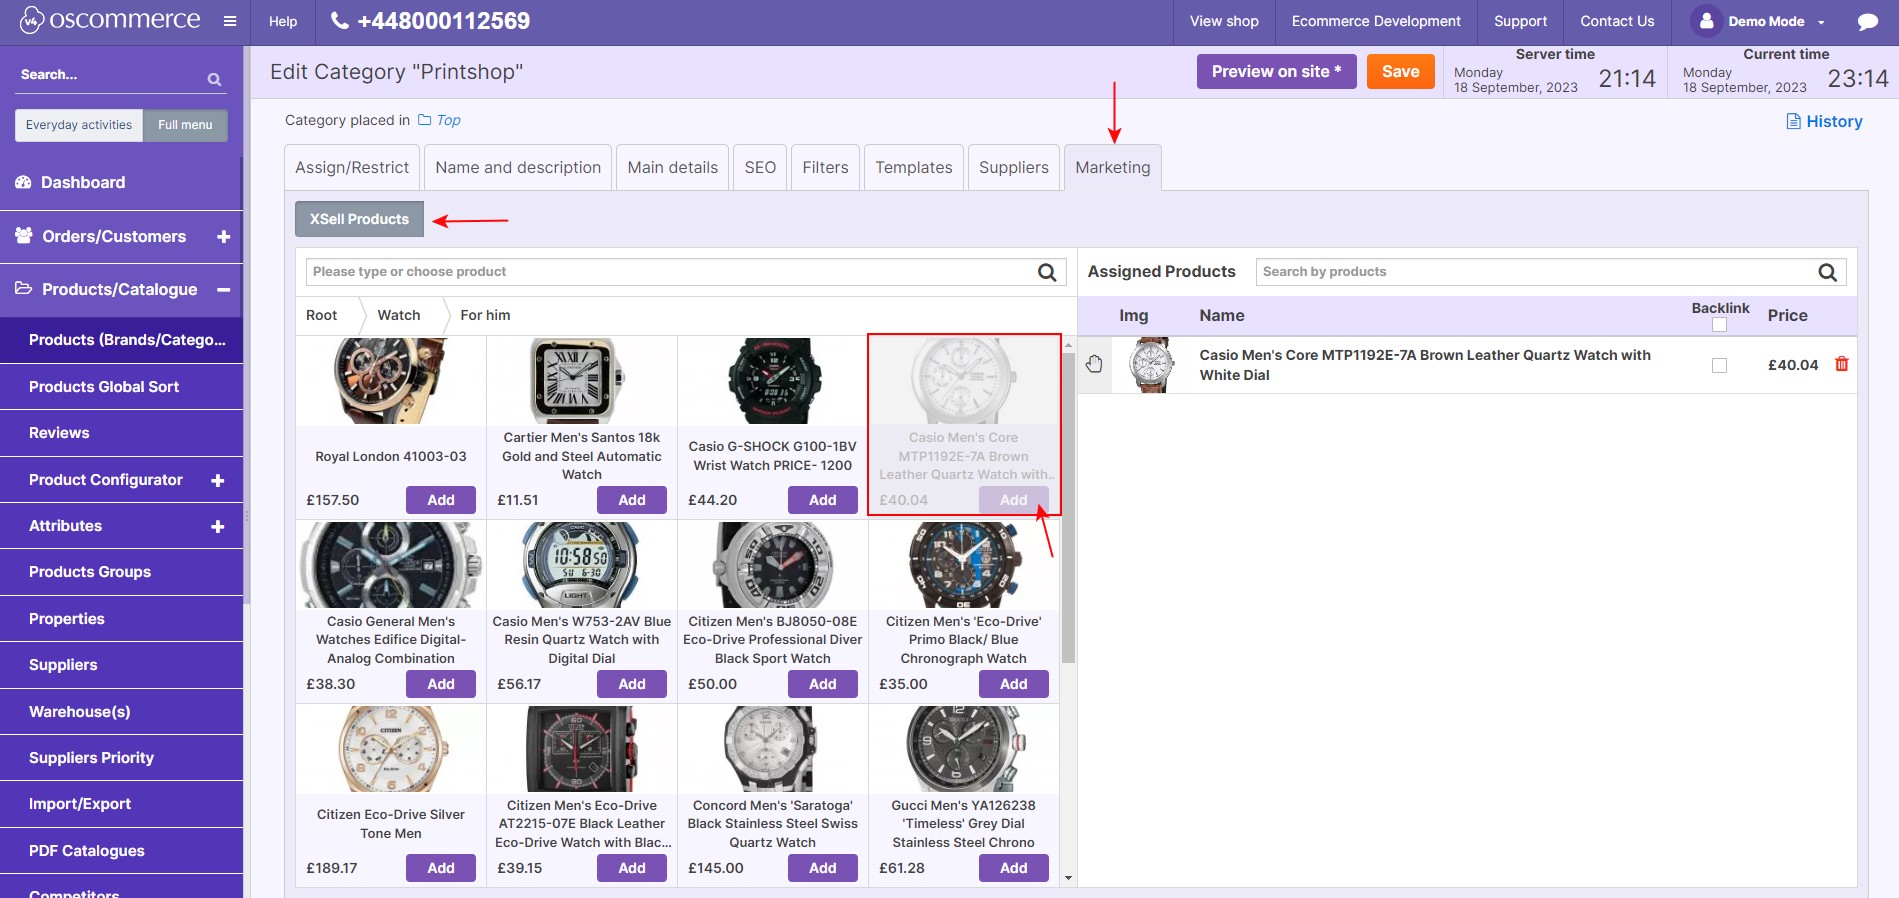
Strategic Marketing Lastly, the "Marketing" tab holds the key to boosting your sales strategies. Link products within categories to facilitate cross-selling efforts, creating a comprehensive shopping experience for your customers. |
 |
.jpg)
.jpg)
.jpg)
.jpg)
By mastering these category management techniques, you'll be able to showcase your products effectively, provide an intuitive browsing experience, and optimize your website for search engines - all contributing to the success of your online venture.
 #1 eCommerce Development Agency