Assigning Products and Categories to Front Ends
Step 1: Accessing Product or Category Management
To begin, log in to your website's admin area. This is where you can make adjustments to your product and category assignments.
Assigning Products to Front Ends and Customer Groups
For Products:
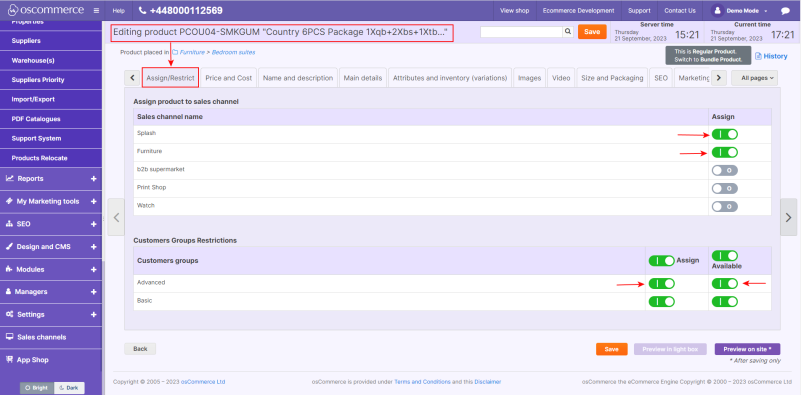
1. Adding or Editing a Product: While in the process of adding or editing a product, locate the "Assign/Restrict" tab.
2. Assigning to a Front End or Sales Channel: Within the "Assign/Restrict" tab, you'll find a list of available front ends or sales channels. To assign the product to a specific one, simply switch the toggle to the "on" position in the "Assign" column next to the desired front end.
3. Assigning to a Customer Group: You can also assign a product to a specific customer group by locating the "Assign" column next to that group and switching it "on." This links the product to the customer group. If necessary, you can make the product out of stock (unavailable) for a certain customer group by disabling the availability status next to that group.
For Categories:
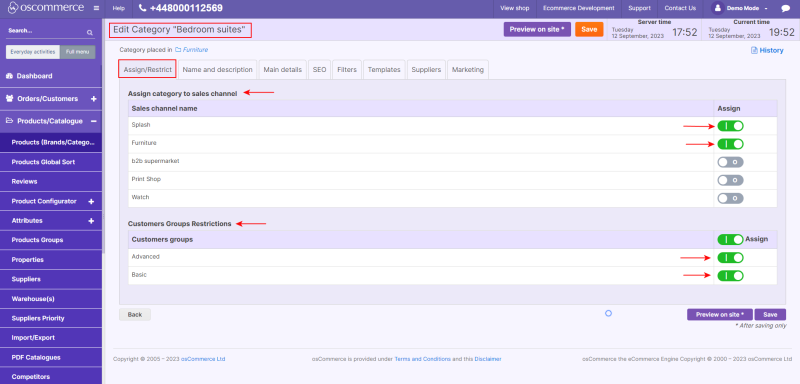
- Adding or Editing a Category: While in the process of adding or editing a category, navigate to the "Assign/Restrict" tab.
- Assigning to a Front End or Sales Channel: Within the "Assign/Restrict" tab, you'll find a list of available front ends or sales channels. To assign the category to a specific one, simply switch the toggle to the "on" position in the "Assign" column next to the desired front end.
- Assigning to a Customer Group: Additionally, you can assign a category to specific customer groups. Set the switch to "on" for the groups for which this category should be available.
Step 2: Bulk Assignments
For efficiency in managing multiple assignments:
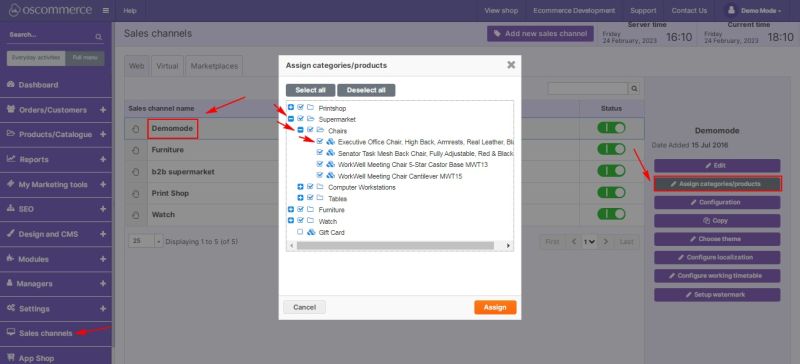
- Navigate to Sales Channels: Click on the "Sales channels" tab.
- Select Front End or Sales Channel: Locate the front end or sales channel you want to assign products or categories to.
- Assign Categories/Products in Bulk: Click on the "Assign categories/products" button.
- Select Categories, Subcategories, or Products: In the pop-up window, click on the "+" icon to expand all subcategories or products if needed. Then, check the boxes next to the categories, subcategories, or products you want to assign.
By following these steps, you can efficiently tailor your product and category offerings to different front ends, sales channels, and customer groups, enhancing the shopping experience for your customers and optimizing your sales strategy.


