Managing Changes History Report
In the dynamic world of e-commerce, staying informed about changes to your products, categories, and customer data is pivotal. This blog unveils the intricacies of the Changes History Report module – your key to monitoring and understanding the evolution of your sales channels.
|
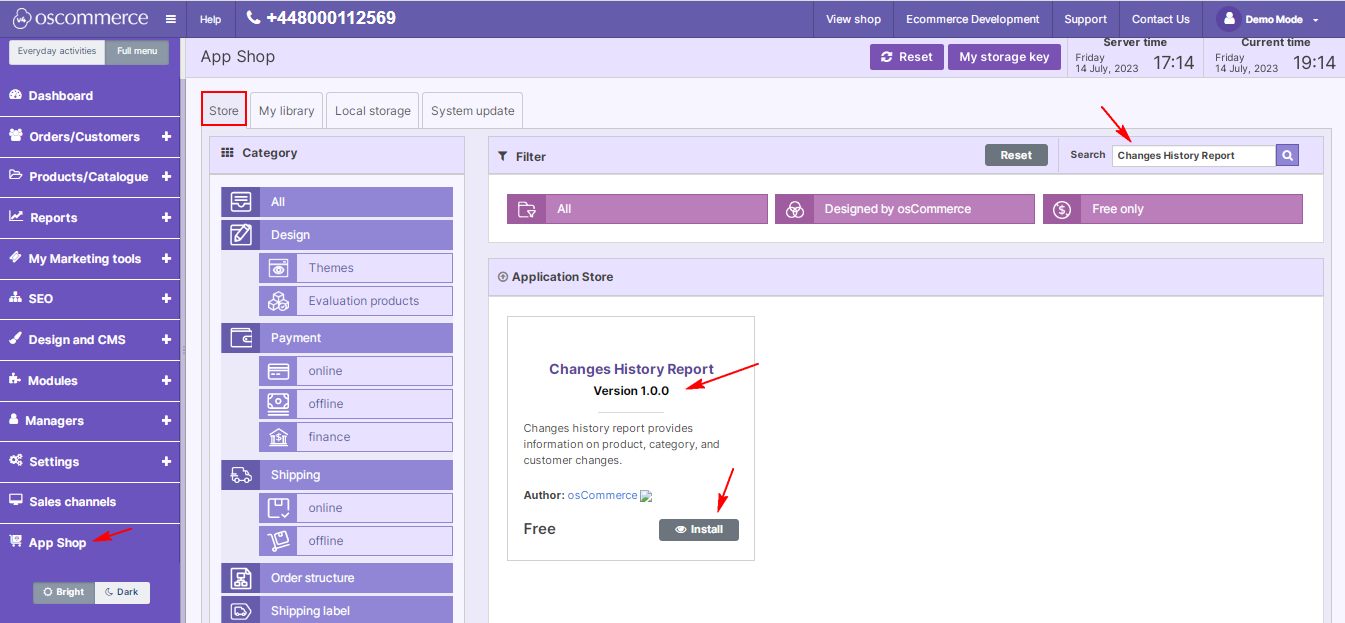
1. Navigating the Admin Area: Begin your journey by accessing the admin area of your website. Head to the App Shop and Store tabs. 2. Installation Process: Locate the Changes History Report module version 1.0.0 through a quick search in the App Shop. Install it seamlessly on your website, unlocking the capability to monitor historical changes across all sales channels. |
 |
 |
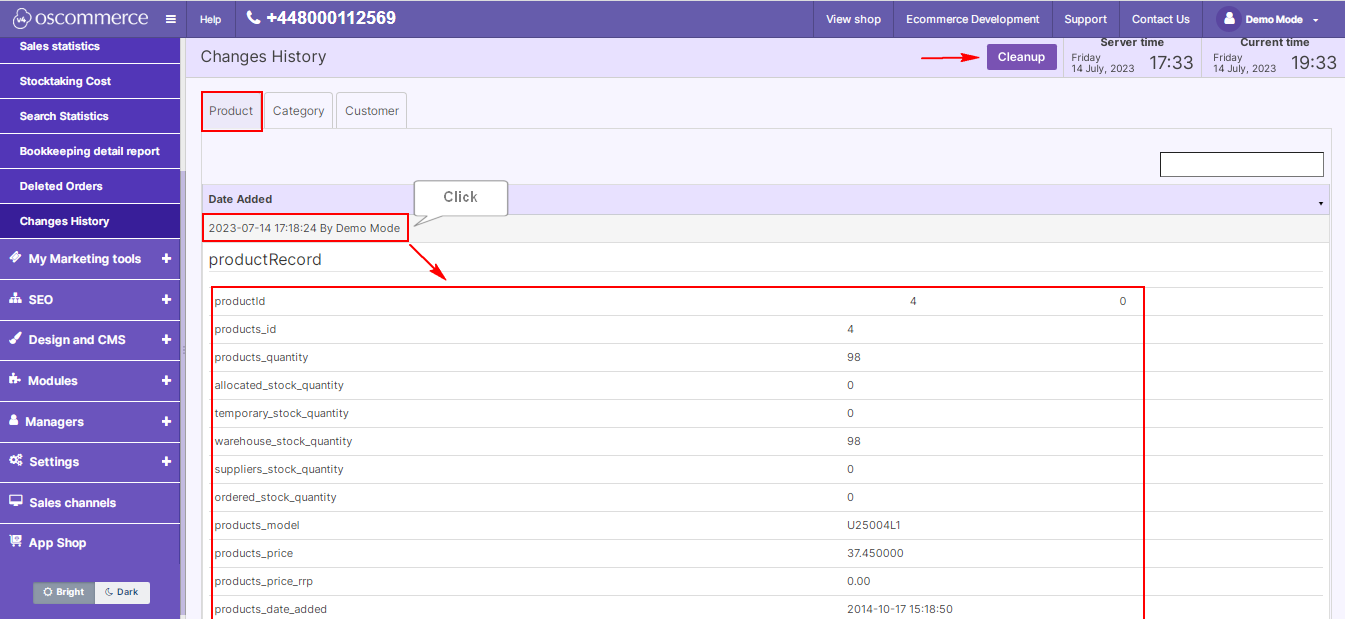
3. Exploring Reports and Changes History Tabs: Once installed, navigate to the Reports section and discover the Changes History tabs. Gain instant access to a chronological overview of changes made to products, categories, and customers. 4. Detailed Information at Your Fingertips: Explore the Changes History Report, providing crucial details such as the date, time, and the person responsible for each change. Click on a record for more in-depth information about the alterations made. 5. Streamlined Cleanup Process: Maintain data integrity with the Cleanup button – a tool allowing you to delete unnecessary information when required, ensuring your records remain relevant and insightful. |
|
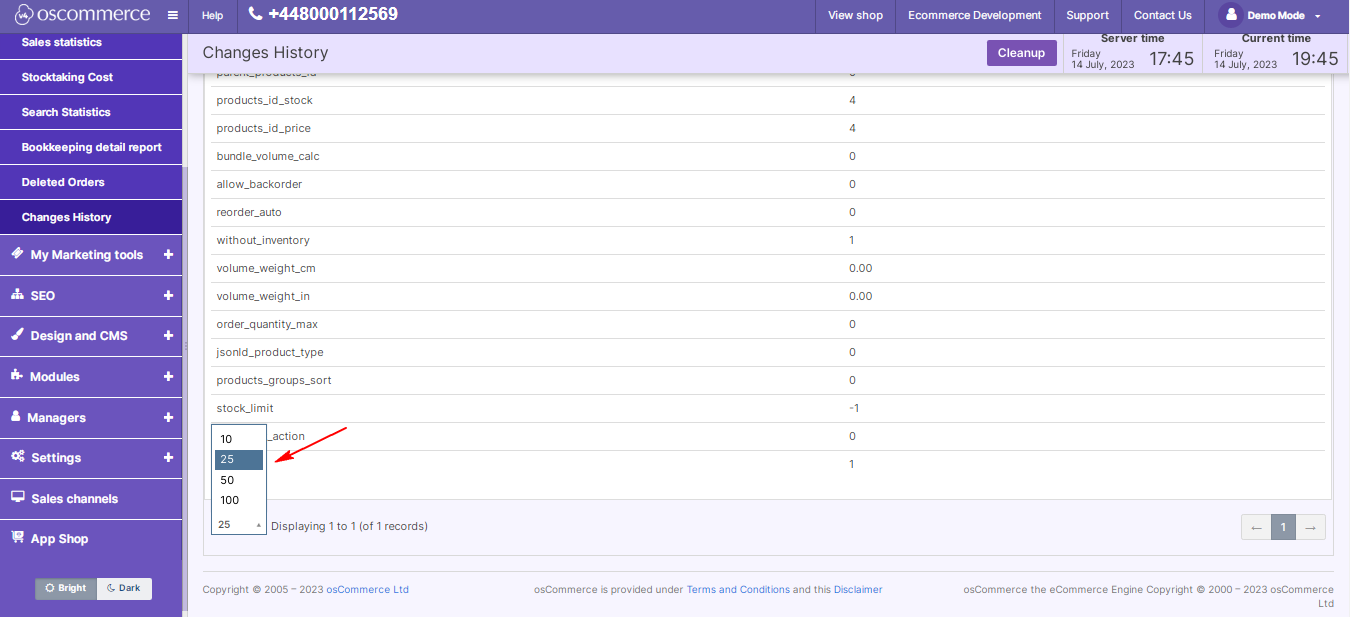
6. Enhanced Record Management: Tailor your experience by setting the display of record numbers per page. This feature facilitates convenient handling of a large number of records, streamlining your workflow. |
|
Effective management necessitates a thorough understanding of your sales channels' evolution. The Changes History Report module equips you with the tools to not only monitor but comprehend changes made to products, categories, and customers. Stay in control, stay informed – master your e-commerce landscape with the Changes History Report module.


