Testing Opayo Server by Elavon Module for osCommerce 2.3 on Front End: Difference between revisions
(Created page with "Welcome to the user guide for testing the Opayo Server by Elavon module on the front end of your osCommerce 2.3 website. This manual will walk you through the steps to verify the functionality of the module during the checkout process. Before proceeding with the testing, ensure you have configured the Opayo Server by Elavon module as per the instructions provided in the manual "Configuring Opayo Server by Elavon Module for osCommerce 2.3". '''Testing Process:''' 1...") |
(No difference)
|
Revision as of 16:54, 25 March 2024
Welcome to the user guide for testing the Opayo Server by Elavon module on the front end of your osCommerce 2.3 website. This manual will walk you through the steps to verify the functionality of the module during the checkout process.
Before proceeding with the testing, ensure you have configured the Opayo Server by Elavon module as per the instructions provided in the manual "Configuring Opayo Server by Elavon Module for osCommerce 2.3".
Testing Process:
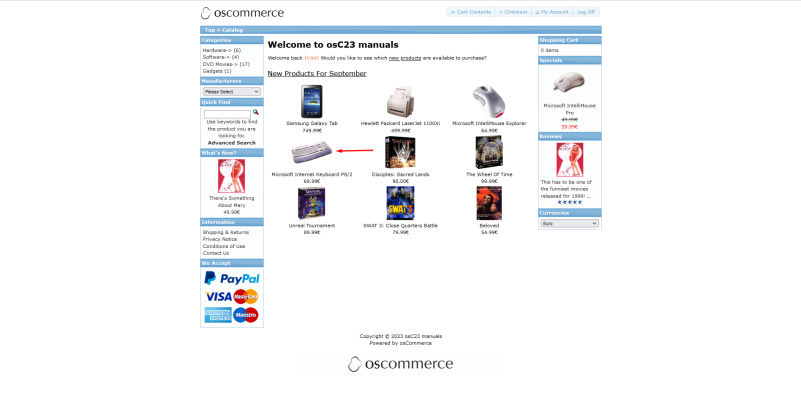
1. Navigate to your website and click on one of the products you wish to purchase.
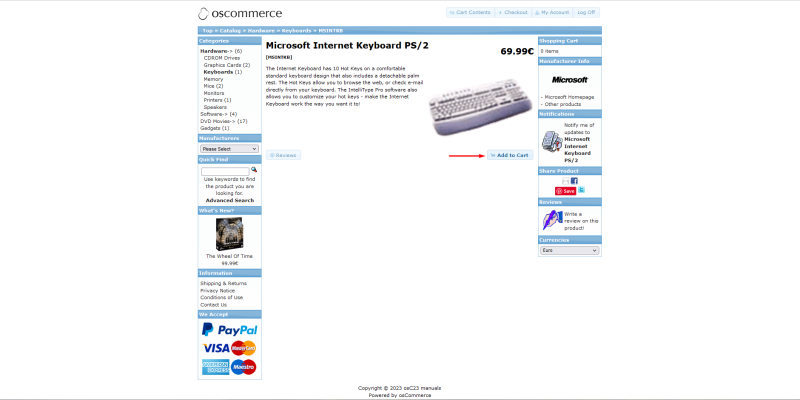
2. Click on the "Add to Cart" button to add the product to your shopping cart.
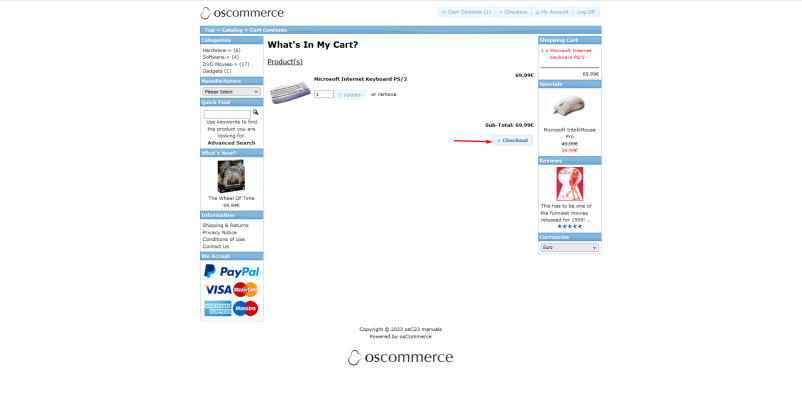
3. After adding the product to your cart, click on the "Checkout" button.
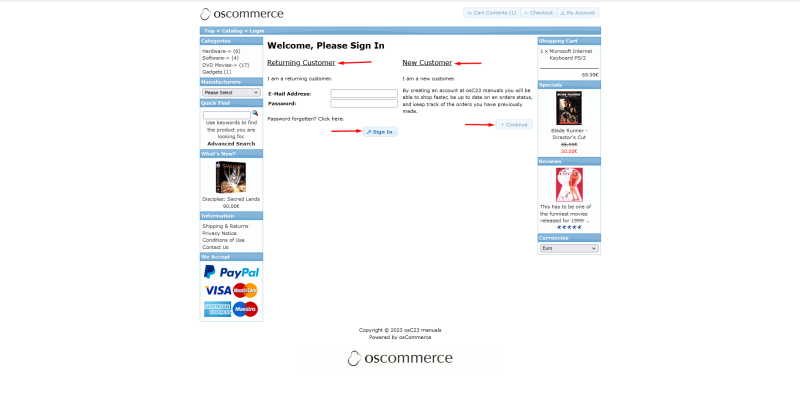
4. Sign in to your existing account or create a new one if you haven't already.
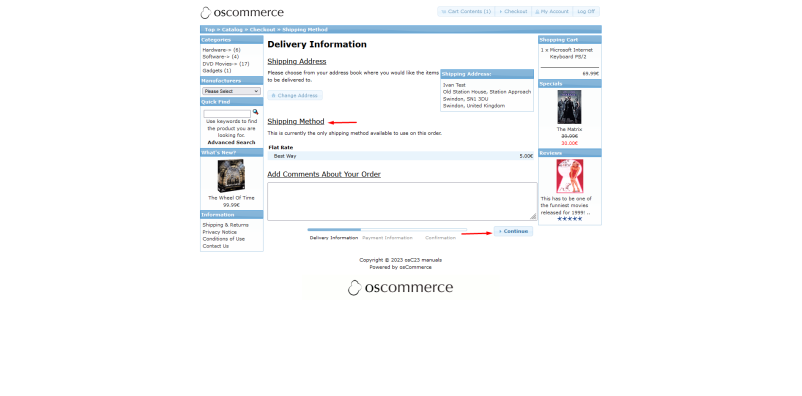
5. Choose the preferred shipping method from the available options. Click on the "Continue" button to proceed.
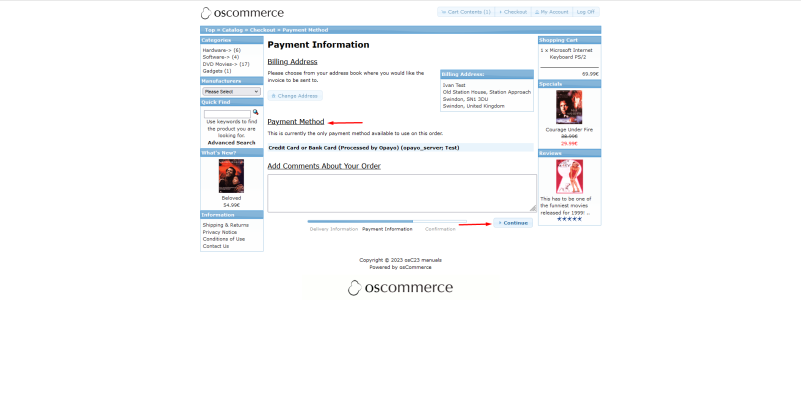
6. Choose the payment method "Credit Card or Bank Card (Processed by Opayo) (opayo_server; Test)". Click on the "Continue" button to proceed.
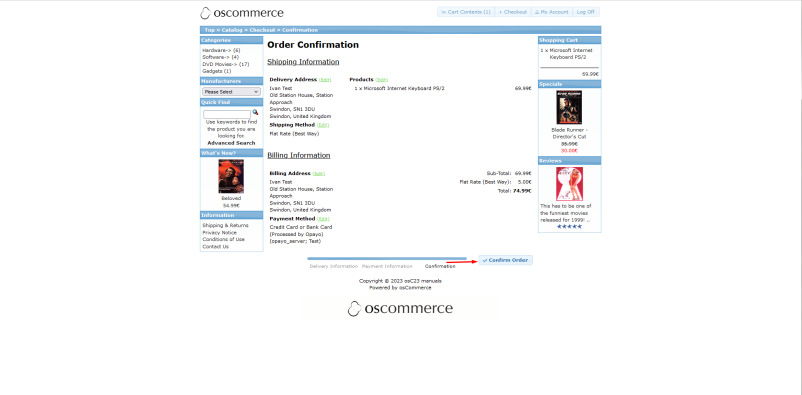
7. Review your order details and click on the "Confirm Order" button to finalize the purchase.
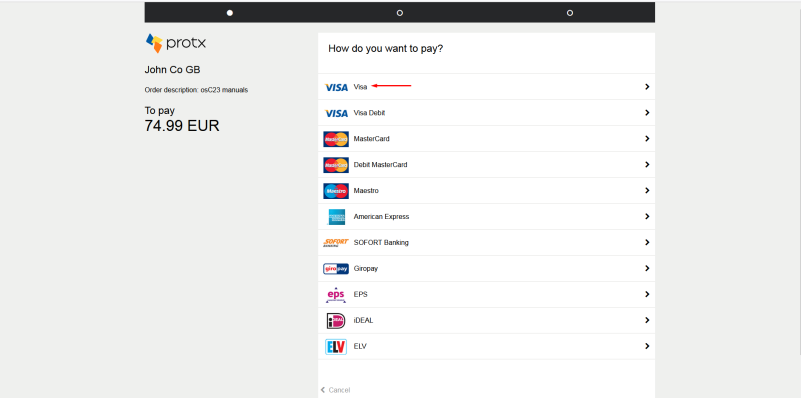
8. Select the required credit card from the options provided.
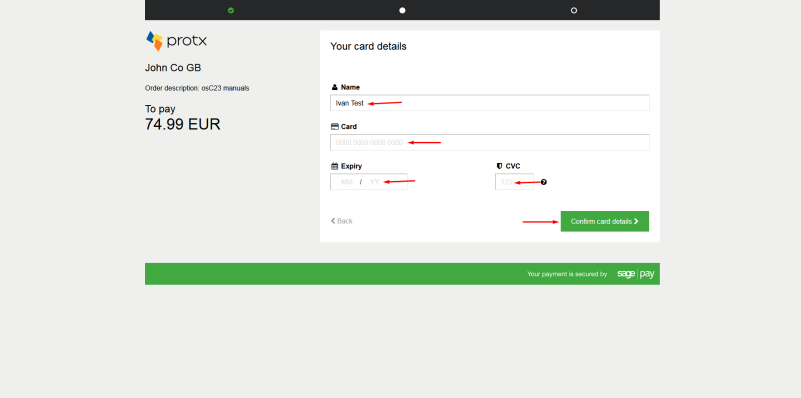
9. Fill in the test information as prompted. Click on the "Confirm card details" button.
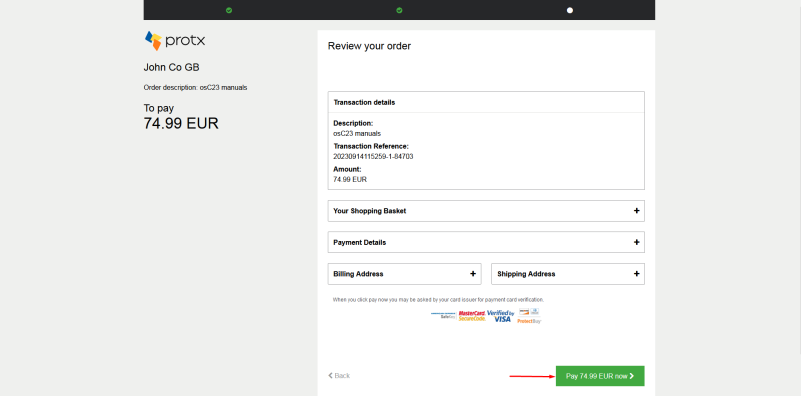
10. Click on the "Pay the required amount now" button.
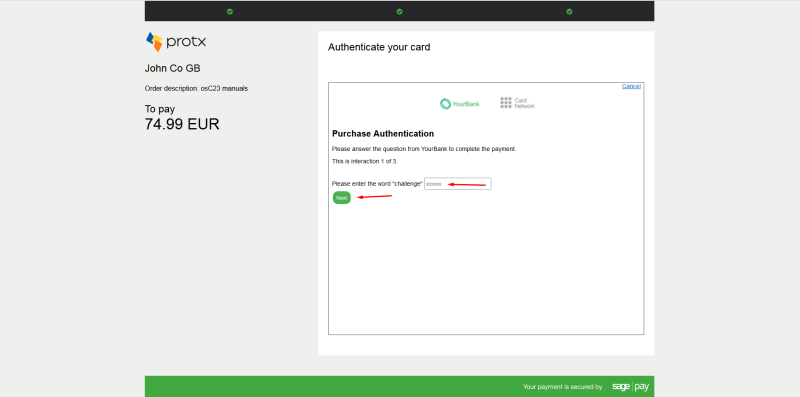
11. Enter the required word and click on the "Next" button.
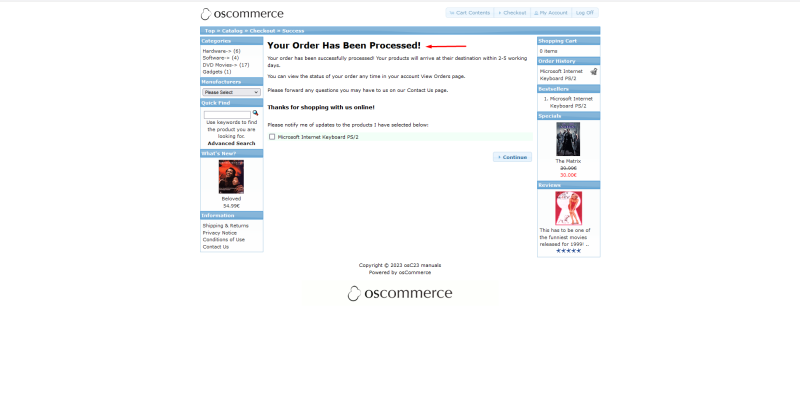
12. Upon successful payment, you will be redirected to a success page confirming that your order has been created.
13. Verify order status:
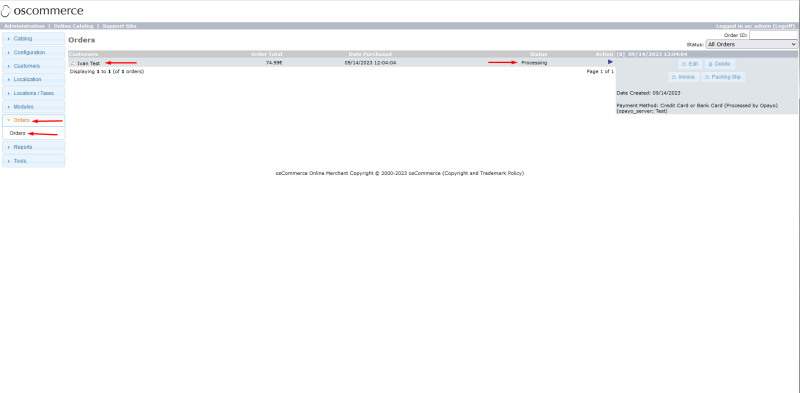
- Navigate to the admin area of your website.
- Click on the "Orders" tab to view the list of orders.
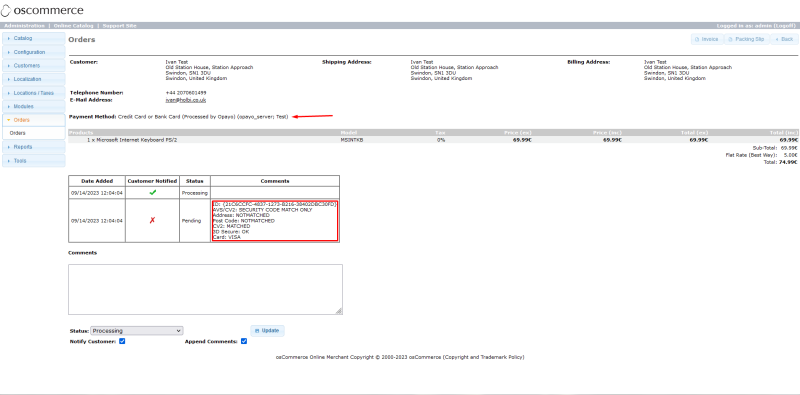
- Locate the order that was just created and click on it to view details.
14. In the order details, you can find further information about the payment method used and transaction details associated with the order.
By following these steps, you can thoroughly test the Opayo Server by Elavon module on the front end of your osCommerce 2.3 website, ensuring smooth transaction processing and order creation.
