OsCommerce version 4.x installation on your own server for single active sales channel
If you need to have the single active sales channel only while installing the osCommerce 4.x version on your own server, first see the manual osCommerce version 4.x installation on your own server for multiple sales channels or watch the corresponding video https://www.youtube.com/watch?v=gg2cZaa-bWU&list=PLHN7KfrDE8gOOTgXVSeFEo4L15Y98IURB&index=3 and then see this manual.
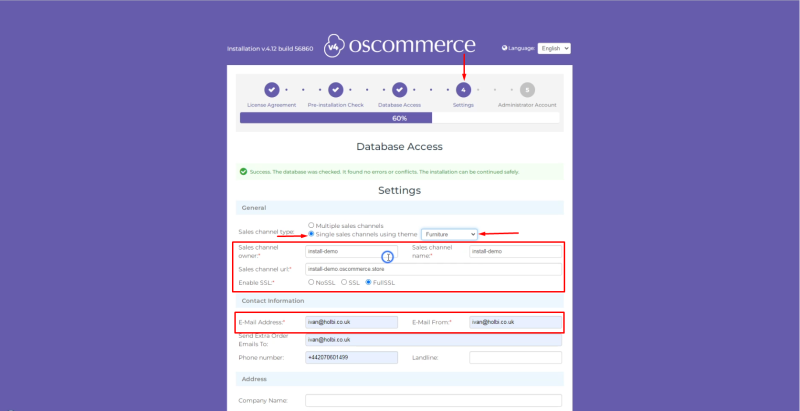
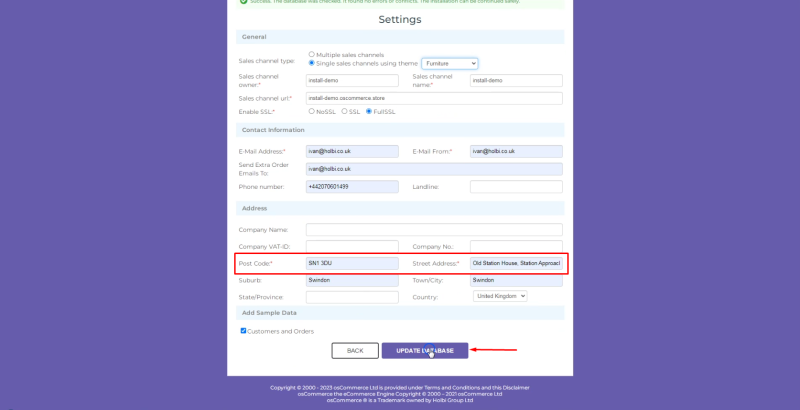
In order to choose the single active sales channel during the installation process mentioned above select the required sales channel from the drop down list at the forth step (Settings) as well as fill in the required fields and click on Update Database button. Here we choose single sales channel and the required theme as Furniture.
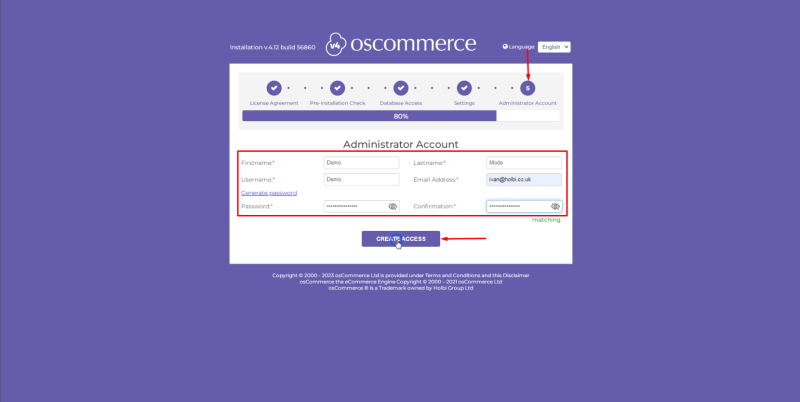
At the fifth step (Administrator Account) fill in the required fields and click on Create Access button. After that the corresponding email will be sent to the specified email address with the link to the administrator area as well as with the login details to it.
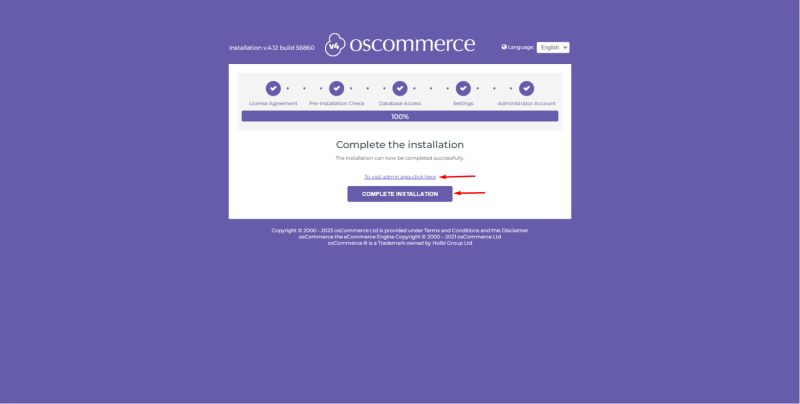
You can click on To visit admin area click here link and Complete Installation button.
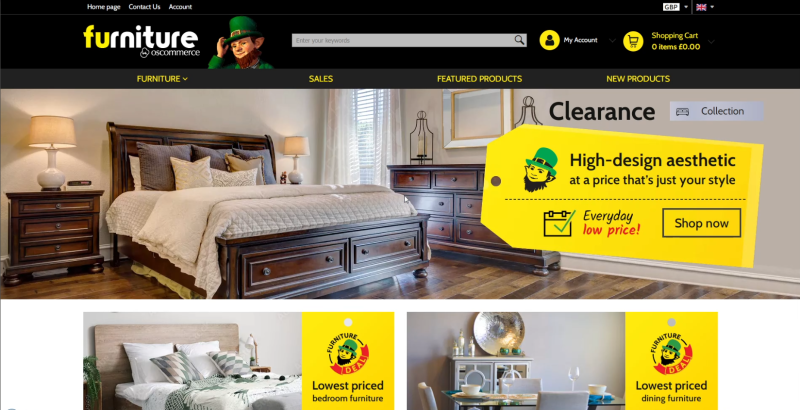
If you click on Complete Installation button you can see the sales channel with the corresponding theme you have chosen - that is the Furniture theme.
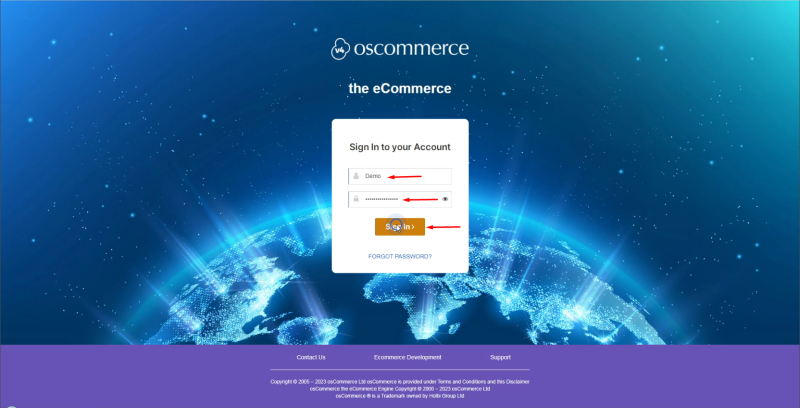
Login to the admin area of your website.
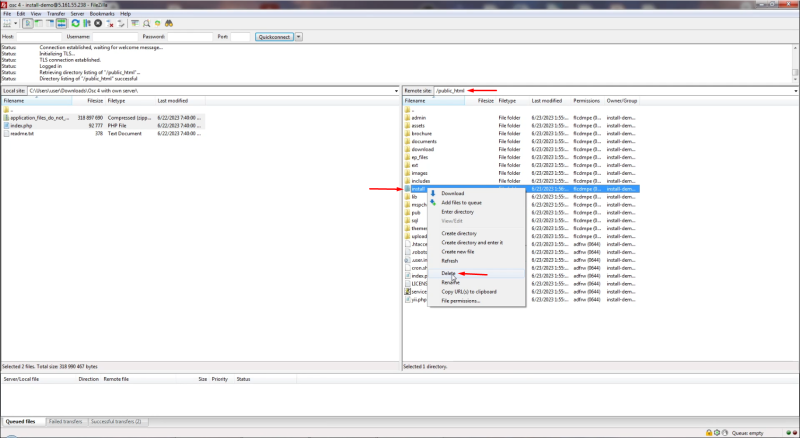
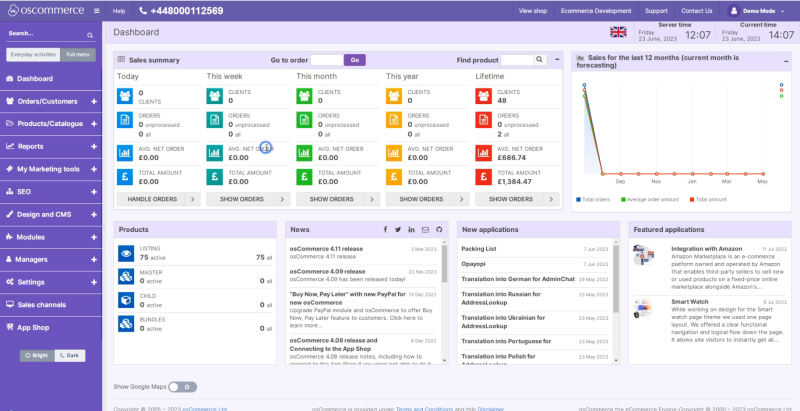
Click on Dashboard tab. You can see the warning asking you to remove the Installation directory for security reasons so remove it from the server.
Refresh the page to make sure the warning does not show up any longer.
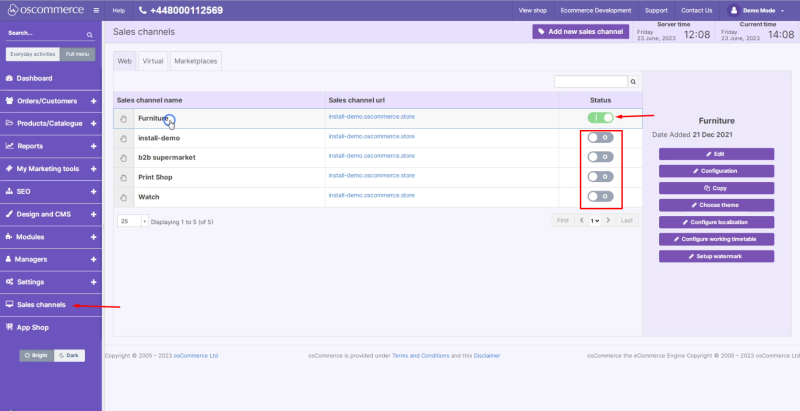
Click on Sales channels tab to confirm that the chosen single sales channel has been activated and the other sales channels are inactive, but can be used for reference in the future if necessary.
Click on Design and CMS and Themes tab to confirm that the Furniture theme has been installed as well as other themes have been installed and can be used for reference in the future if necessary.
You can start configuring your website further.
See the link to the playlist below demonstrating the osCommerce version 4.x installation on your own server, Install osCommerce for me and Let me install myself options:
https://www.youtube.com/watch?v=XivAKdQTni8&list=PLHN7KfrDE8gOOTgXVSeFEo4L15Y98IURB
