Managing Mollie Pay
Welcome to the user guide for managing Mollie Pay, a popular European payment service that allows you to accept payments using various methods. In this guide, you'll learn how to seamlessly integrate Mollie Pay with your website and configure its settings to suit your business requirements. Follow the steps below to successfully incorporate the Mollie Pay module and enhance your payment options.
1. Installation Process
1.1 To begin the installation process, access the admin area of your website. This is typically the backend of your website where you manage its settings and functionality.
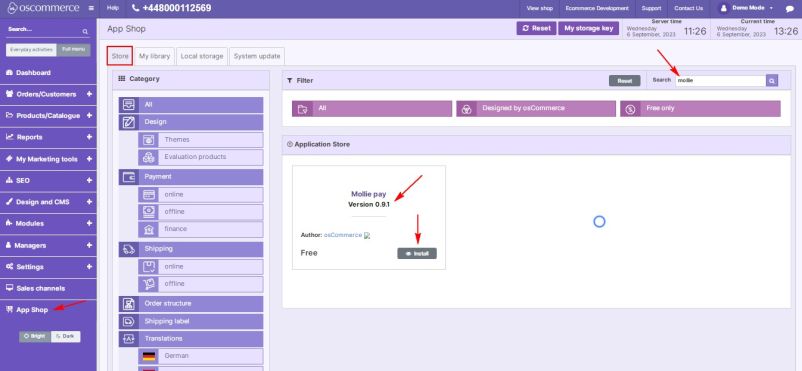
1.2 Next, navigate to the "App Shop" and "Store" tabs within your admin area.
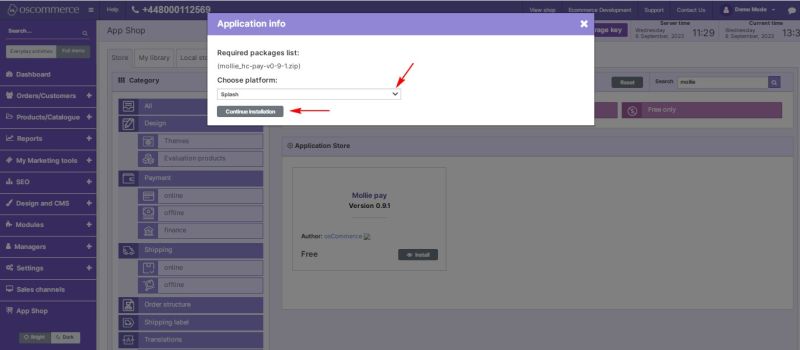
1.3 Use the search function to locate the Mollie Pay module, version 0.9.1. Once you find it, proceed to install the module on your website. Follow any on-screen prompts or instructions to complete the installation process.
2. Configuring the Mollie Pay Module
After successfully installing the Mollie Pay Module, it's time to configure it to enable seamless integration with the Mollie payment service.
2.1 Accessing Module Settings
You can access the module settings in one of two ways:
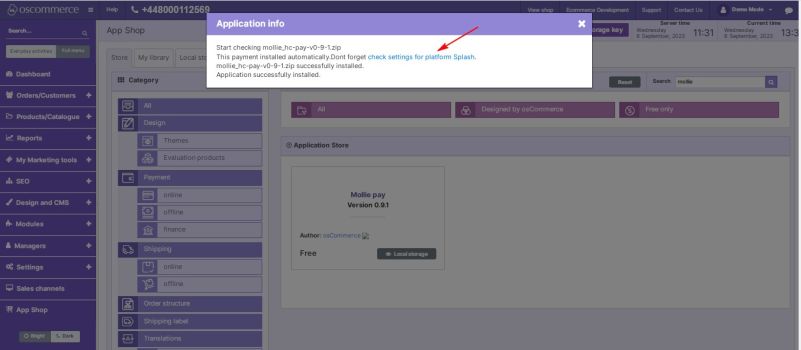
Click on the "Check settings for platform…" link provided.
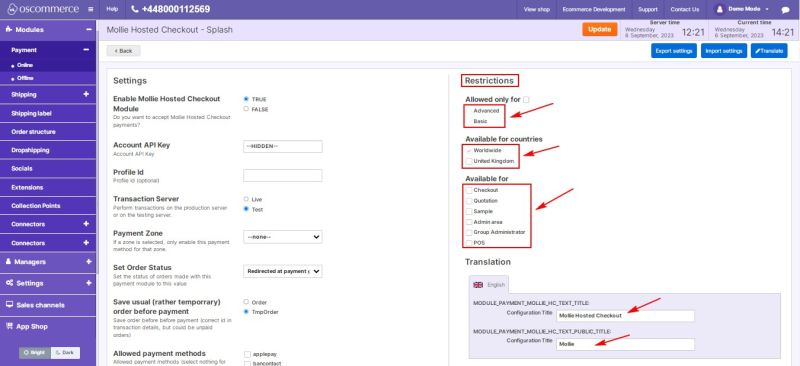
Alternatively, navigate to the "Modules," "Payment," and "Online" tabs within your admin area. Locate the "Mollie Hosted Checkout" module
and click on the “Edit” button to access its settings.
2.2 Configuring Restrictions
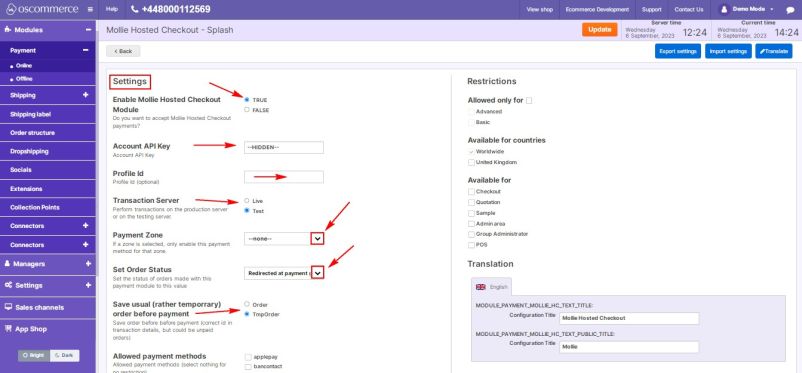
In the "Restrictions" section, you can tailor the Mollie Pay module to meet your specific requirements. Here's how:
- Restrict Mollie Pay to specific customer groups, countries, and website pages.
- Specify the module name for both the backend and frontend in your desired language.
2.3 Configuring Settings
In the "Settings" section, configure the Mollie Pay module options as follows:
- Toggle the option to enable the Mollie Pay module for your website.
- Enter the account API key and profile ID for using the Mollie service.
- Toggle between Live or Test mode to perform transactions on the production server or the testing server.
- Select the payment zone from the drop-down list.
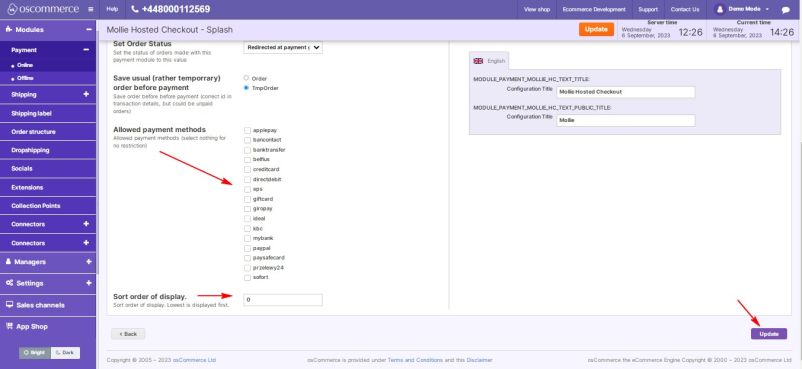
- Set order statuses for orders made with Mollie Pay by selecting statuses from the drop-down list.
- Enable the option to save usual or temporary orders before payment.
- Select the allowed payment methods.
- Control the order in which payment options are displayed during checkout. Enter a value in the corresponding field to set the payment priority.
Lower values will prioritize Mollie Pay over other payment methods.
Congratulations! You have successfully integrated the Mollie payment system with your website and customized its settings to meet your specific needs. Your website is now equipped to accept payments through various methods offered by Mollie Pay.
For any additional assistance or support, please refer to the documentation provided with the Mollie Pay module.
