Managing Google Authenticator: Difference between revisions
Jump to navigation
Jump to search


No edit summary Tag: Reverted |
No edit summary Tag: Manual revert |
||
| Line 1: | Line 1: | ||
'''Note: This manual is for osCommerce v4.''' | '''Note: This manual is for osCommerce v4.''' | ||
Latest revision as of 18:47, 24 February 2023
Note: This manual is for osCommerce v4.
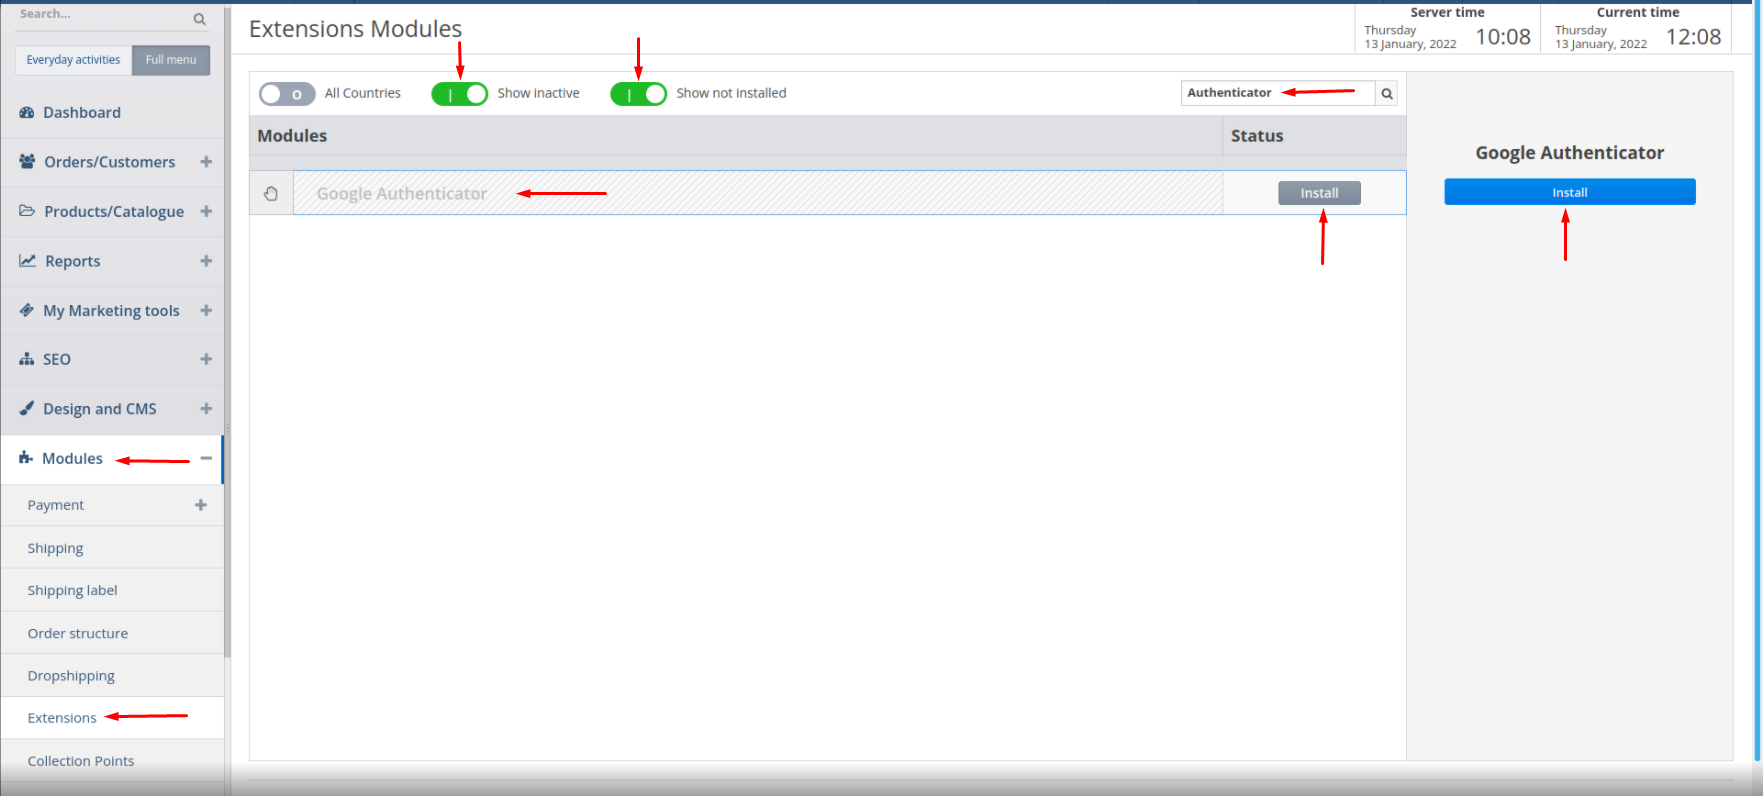
After you accessed the admin area of your website click on Modules and Extensions tabs. Then switch on Show inactive and Show not installed switches, type Authenticator in the search field and click on any of Install buttons next to Google Authenticator module.

You will see the following screen afterwards.

Click on True radio button and then on Update button to switch on this module.

As a result this module will be installed and switched on.

After that login to the admin area of your website.

The system will show up a QR code and will offer you to scan it with your Google Authenticator application.

When you login to the admin area of your website next time there will not be any QR code any longer.
