Managing Cities: Difference between revisions
Jump to navigation
Jump to search
No edit summary |
No edit summary |
||
| Line 1: | Line 1: | ||
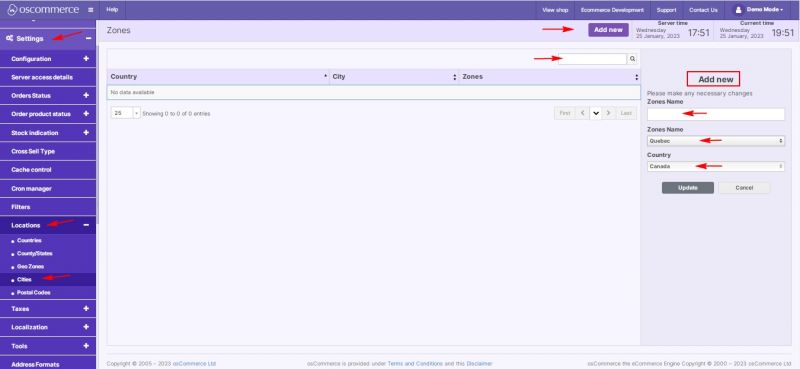
After you accessed the admin area of your website click on '''Settings, Locations''' and '''Cities''' tabs. | |||
Under this tab you can '''edit''' '''cities''' and '''add''' '''new ones'''. | |||
While adding or editing a city it is possible to: | |||
* choose country and zone (using dropdown list) | * choose country and zone (using dropdown list) | ||
* enter city name | * enter city name | ||
'''Quick search''' is available to search for cities by name. | '''Quick search''' is available to search for cities by name. | ||
[[File:1118 Cities.jpg|none|thumb|800x800px]] | [[File:1118 Cities.jpg|none|thumb|800x800px]] | ||
Revision as of 18:04, 24 February 2023
After you accessed the admin area of your website click on Settings, Locations and Cities tabs. Under this tab you can edit cities and add new ones.
While adding or editing a city it is possible to:
- choose country and zone (using dropdown list)
- enter city name
Quick search is available to search for cities by name.
