Managing B2B Module: Difference between revisions
m (Protected "Managing B2B Module" ([Edit=Allow only administrators] (indefinite) [Move=Allow only administrators] (indefinite)) [cascading]) |
No edit summary |
||
| Line 40: | Line 40: | ||
# Go to the "Orders/Customers" and "Customer groups" tabs. | # Go to the "Orders/Customers" and "Customer groups" tabs. | ||
# Select the | # Select the required customer group. | ||
# Click on the "Edit" button to manage the extended functionality for this customer group. | # Click on the "Edit" button to manage the extended functionality for this customer group. | ||
| Line 46: | Line 46: | ||
Under the "Main" tab of the | Under the "Main" tab of the customer group, you can: | ||
* Enable applying taxes as needed. | * Enable applying taxes as needed. | ||
| Line 56: | Line 56: | ||
''Congratulations! You've successfully installed the B2B Module and configured its settings. With the extended functionality for | ''Congratulations! You've successfully installed the B2B Module and configured its settings. With the extended functionality for customer groups, you can streamline your business operations and manage transactions more efficiently.'' | ||
''For further inquiries, refer to the B2B Module documentation. Enjoy the benefits of optimized customer group functionality with the B2B Module!'' | ''For further inquiries, refer to the B2B Module documentation. Enjoy the benefits of optimized customer group functionality with the B2B Module!'' | ||
Latest revision as of 16:17, 10 August 2023
Welcome to the user guide for managing the B2B Module. This guide will assist you in extending your basic customer group functionality by installing and configuring the B2B Module. Follow the steps below to seamlessly integrate the module and optimize its capabilities.
1. Installation Process
To enhance your website's customer group functionality with the B2B Module, follow these installation steps:
- Access the admin area of your website.
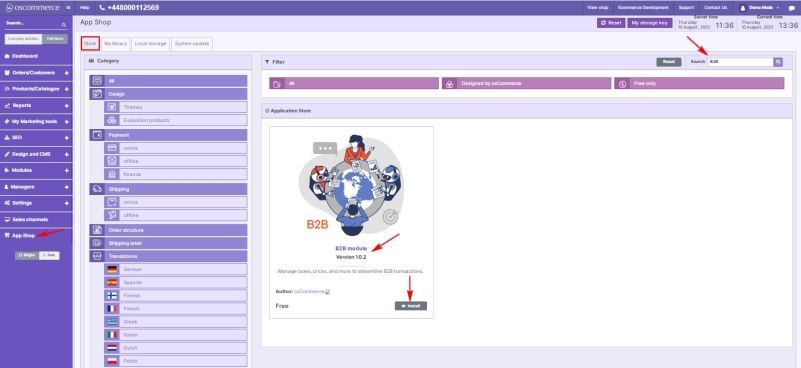
- Navigate to the "App Shop" and "Store" tabs.
- Find the B2B module version 1.0.2 using the search function.
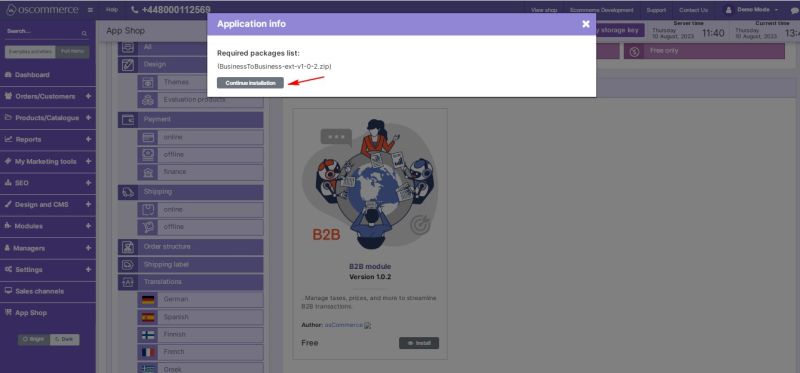
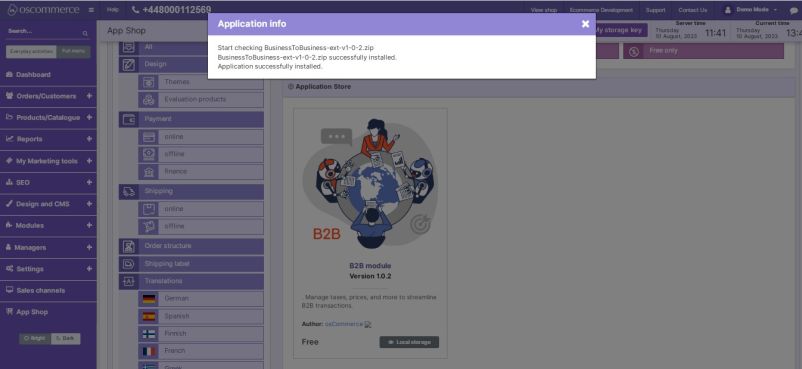
- Install the module on your website.
Follow any on-screen prompts or instructions to complete the installation process.
2. Configuring the B2B Module
After successfully installing the B2B Module, proceed to configure it to extend the functionality for your business customers.
2.1. Accessing Module Settings
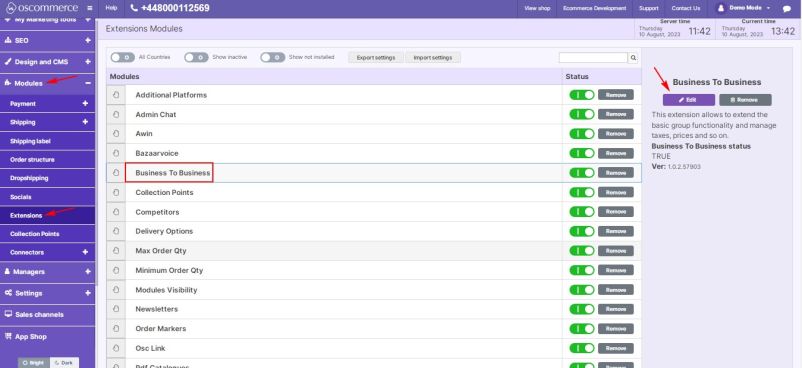
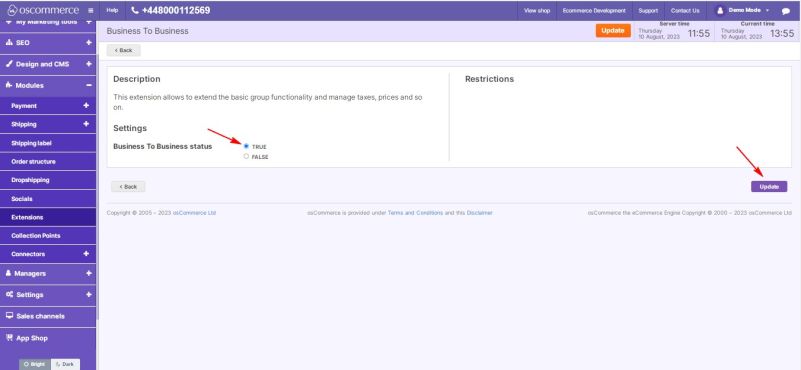
- Go to the "Modules" and "Extensions" tabs.
- Locate the "Business To Business" module.
- Click on the “Edit” button to access its settings.
2.2. Enabling the Module
- Toggle the option to enable the B2B module for your website.
- Click on the "Update" button to save your changes.
2.3. Managing Customer Group Functionality
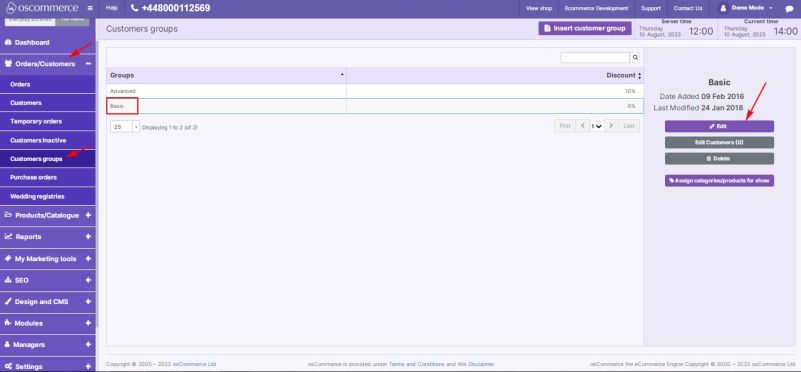
- Go to the "Orders/Customers" and "Customer groups" tabs.
- Select the required customer group.
- Click on the "Edit" button to manage the extended functionality for this customer group.
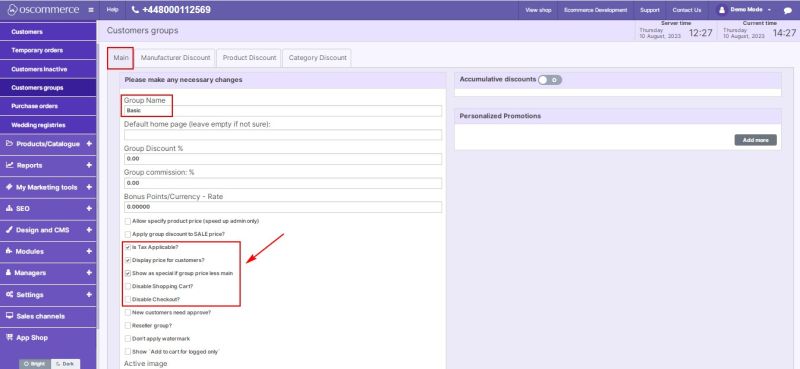
Under the "Main" tab of the customer group, you can:
- Enable applying taxes as needed.
- Display prices to your customers based on your requirements.
- Offer special prices for group purchases by checking the corresponding options.
- If necessary, disable the shopping cart and checkout functionalities.
Congratulations! You've successfully installed the B2B Module and configured its settings. With the extended functionality for customer groups, you can streamline your business operations and manage transactions more efficiently.
For further inquiries, refer to the B2B Module documentation. Enjoy the benefits of optimized customer group functionality with the B2B Module!
