Managing Stock
Note: This manual is for osCommerce v4.
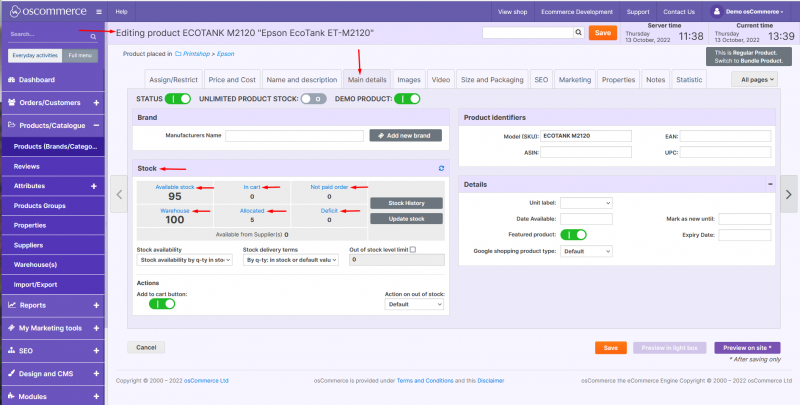
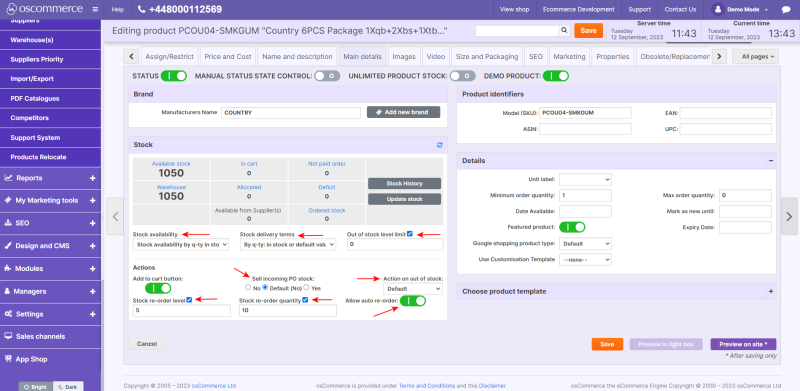
After you accessed the admin area of your website, click on the Products/Catalogue and Products (Brands/Categories) tabs. On this page while adding or editing a product, you can manage its stock. Click on the Main details tab. In the stock section, you can view the stock for your product in real time.
Available stock means the stock that is available on your website now. If a customer puts a number of products in the cart, this number appears in the In cart field, and the Available stock field is updated accordingly.
Then, if this customer creates the order based on the products in the cart, this product number is removed from the In cart field and appears in the Not paid order field while the Available stock number remains unchanged.
Then, if this customer makes the payment according to this order, the product number is removed from the Not paid order field and appears in the Allocated field while the Available stock number remains unchanged.
Finally, after the order is shipped, the product number is removed from the Allocated field, and the Warehouse field is updated accordingly (that is, the Warehouse stock is updated only after the products are actually shipped to the customer) while the Available stock number remains unchanged.
The Deficit field is filled in only if a customer orders more products than are available and the seller allows it to do.
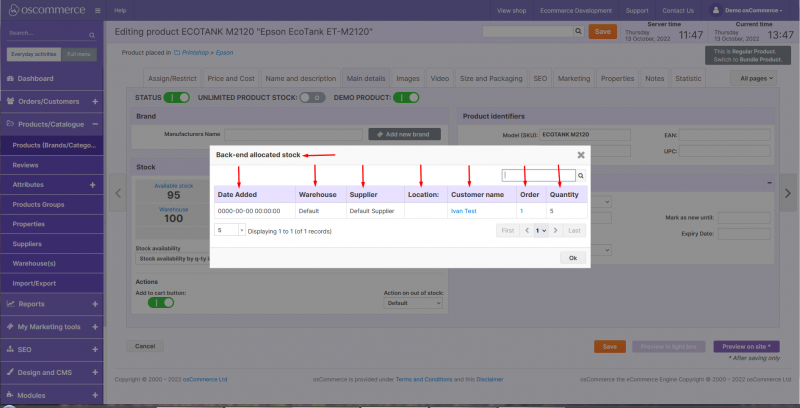
All the fields mentioned above are clickable, so you can click on them to get more information about the actions connected to these fields. For example, if you click on the Allocated link, you can find the following information in the columns.
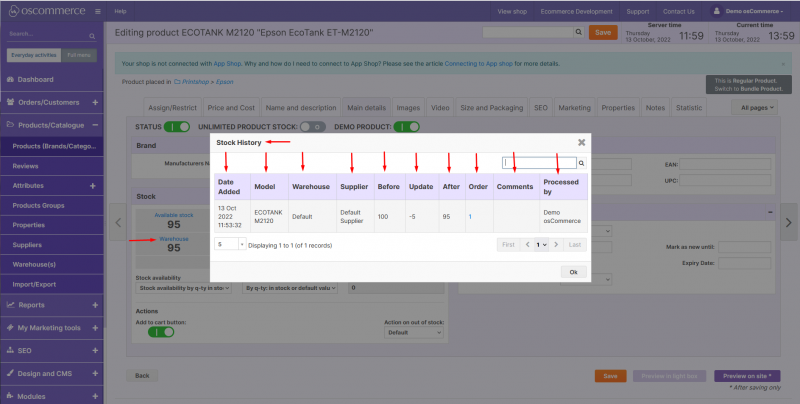
After the order is shipped, the product number is removed from the Allocated field, and the Warehouse field is updated accordingly (that is, the Warehouse stock is updated only after the products are actually shipped to the customer). The corresponding record can be found if you click on the Stock History button.
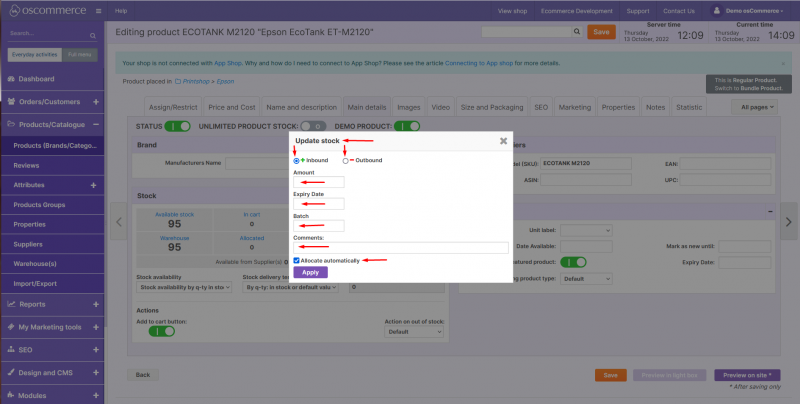
If you click on the Update stock button, click on either + Inbound to add the stock, or – Outbound to deduct the stock radio buttons. If you click on + Inbound radio button, add the stock by filling in the required amount, expiry date, batch and comments fields as well as allocate automatically by checking the box next to it (If a product was out of stock at some point when an order was placed, the product in this order is in the deficit status. By checking allocate automatically option, you can make the system automatically update such orders, so the product status will be changed from the deficit to received).
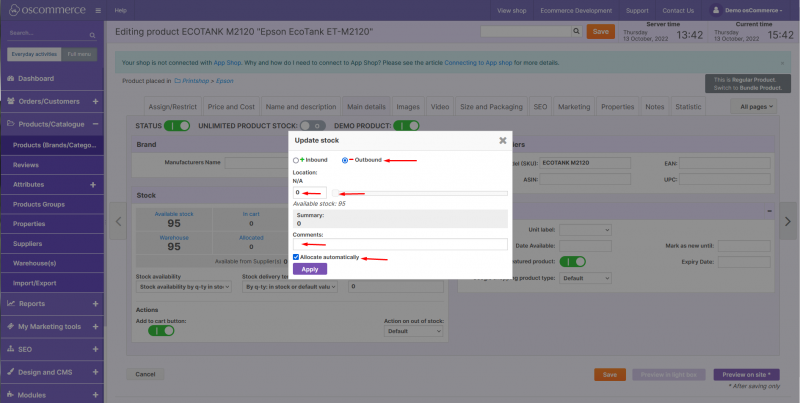
If you click on the – Outbound radio button, deduct the stock by filling in the corresponding field or using the scrollbar, fill in the comments field as well as allocate automatically by checking the box next to it (If a product was out of stock at some point when an order was placed, the product in this order is in the deficit status. By checking allocate automatically option, you can make the system automatically update such orders, so the product status will be changed from the deficit to received).
You can also choose the required options from stock availability, stock delivery terms and action on out of stock drop down lists as well as specify out of stock level limit, stock reorder level, and stock reorder quantity by checking the corresponding boxes and filling in the relevant fields. Additionally, you can enable auto reorder option and sell incoming PO stock.
