Managing Product Relocation
Optimize your inventory management with our blog on managing Product Relocation. Effectively monitor the movement of products between warehouses. Follow these steps, accessible in the admin area of your website, to streamline and track product relocations seamlessly.
|
Accessing Admin Area:
Installing Product Relocation Module:
|
.png) |
|
|
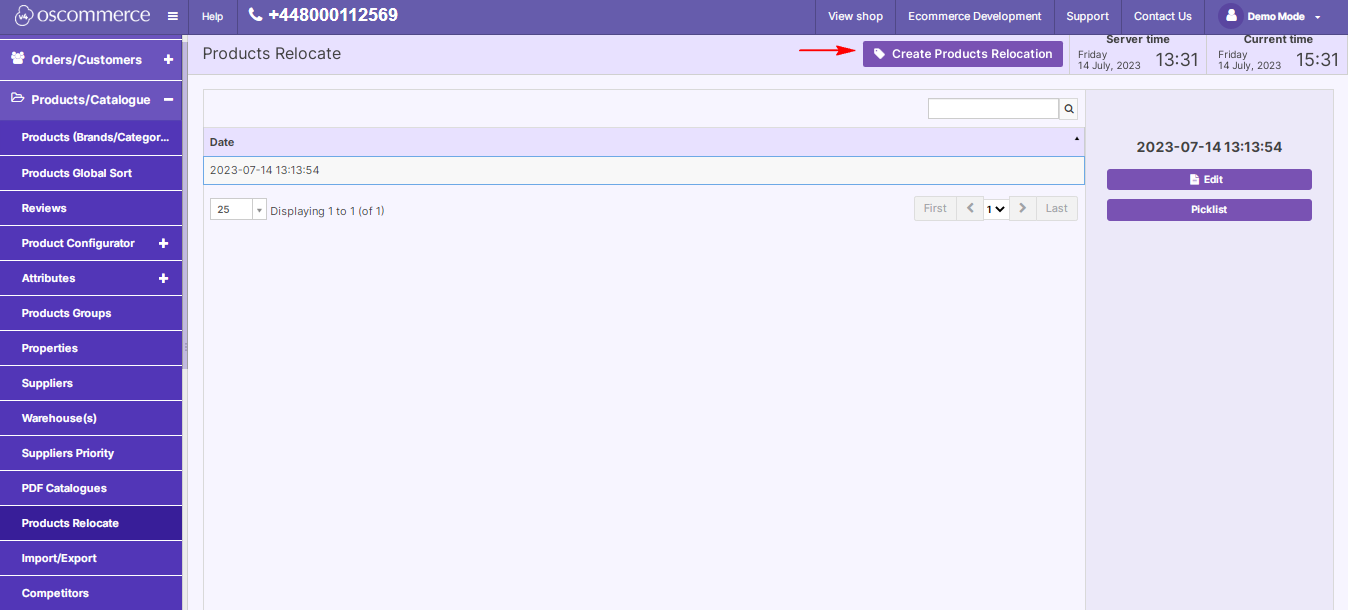
Initiating Product Relocation:
|
|
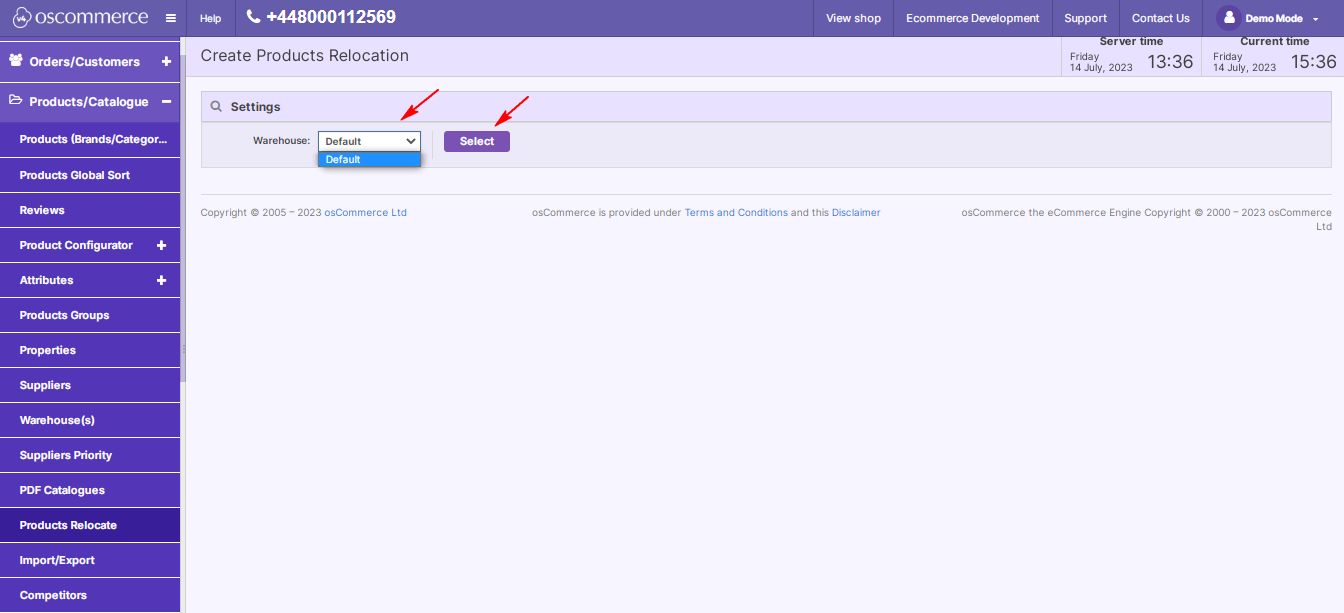
Selecting Source Warehouse:
|
|
|
|
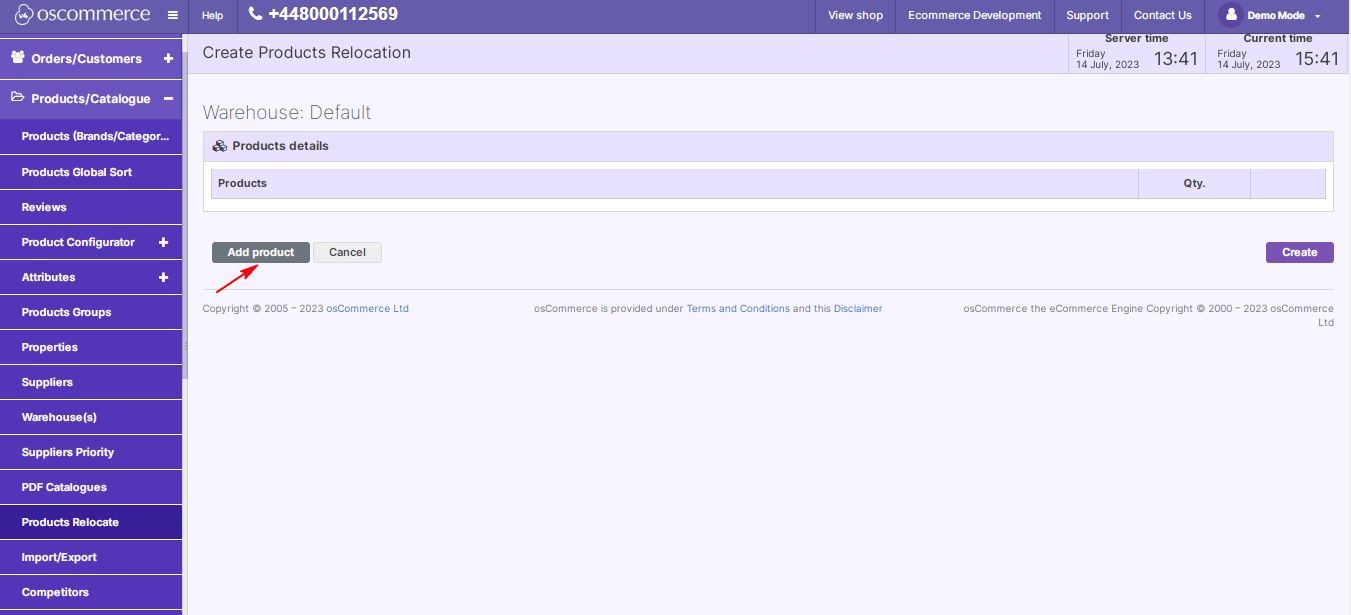
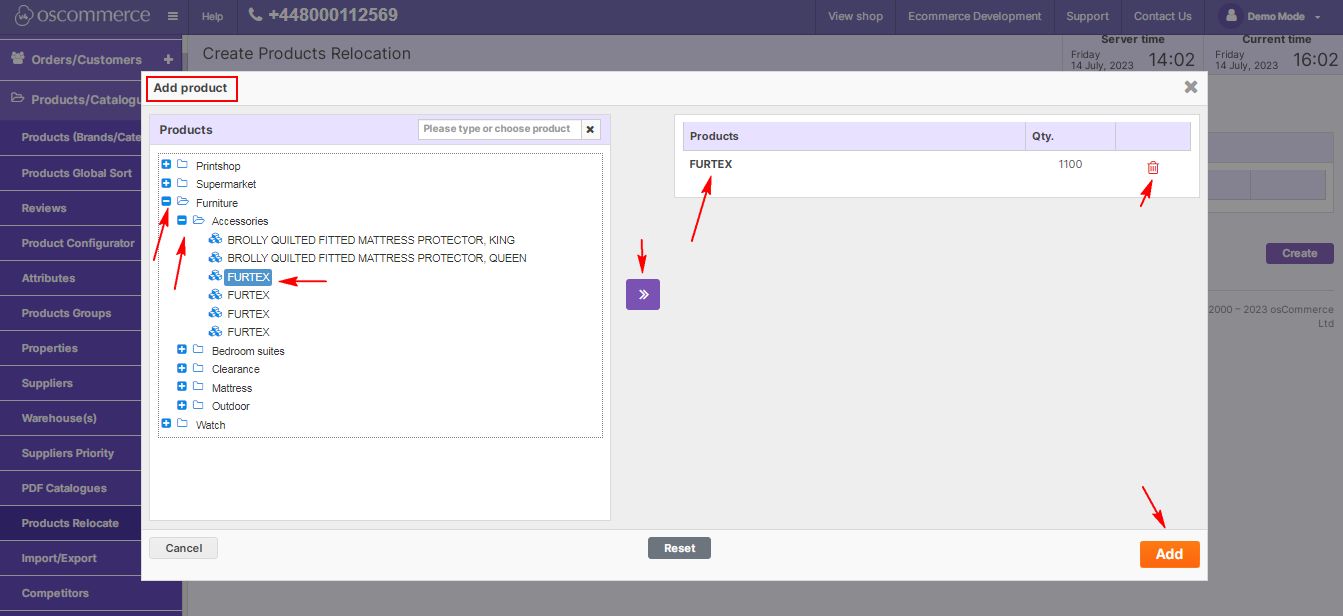
Adding Products for Relocation:
|
|
2. Select desired products and click ">>" to add. 3. To delete, click the bin icon. 4. Click "Add" after selecting products. |
|
|
|
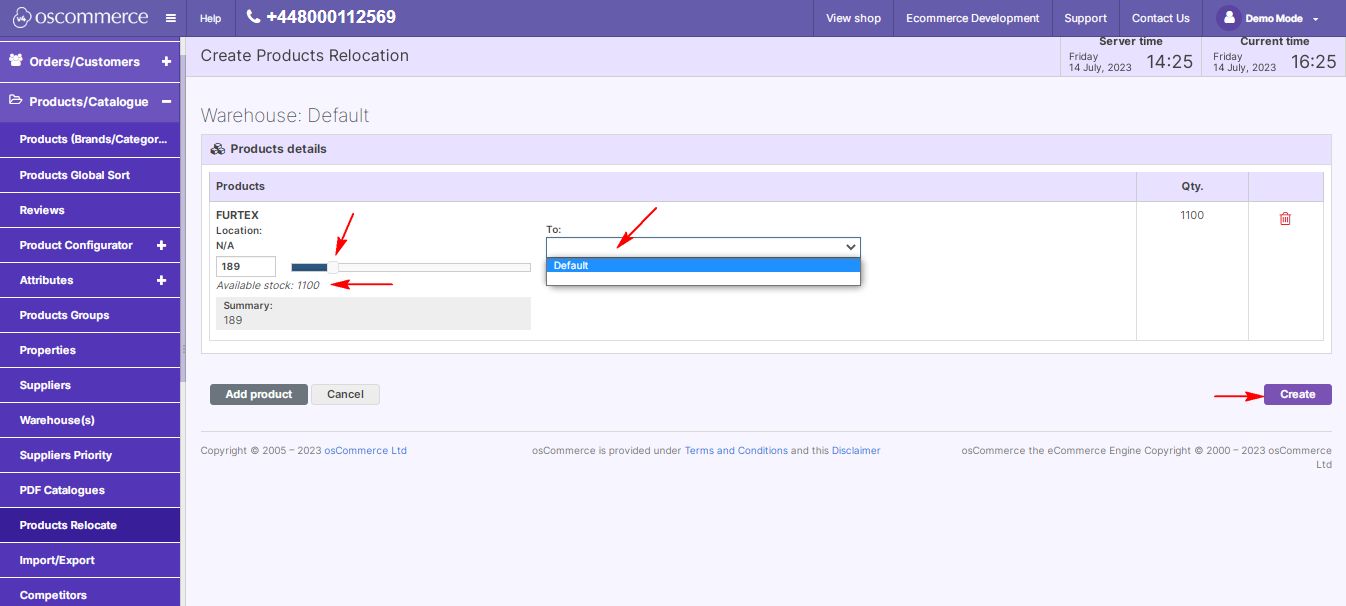
Specifying Quantity and Destination:
|
|
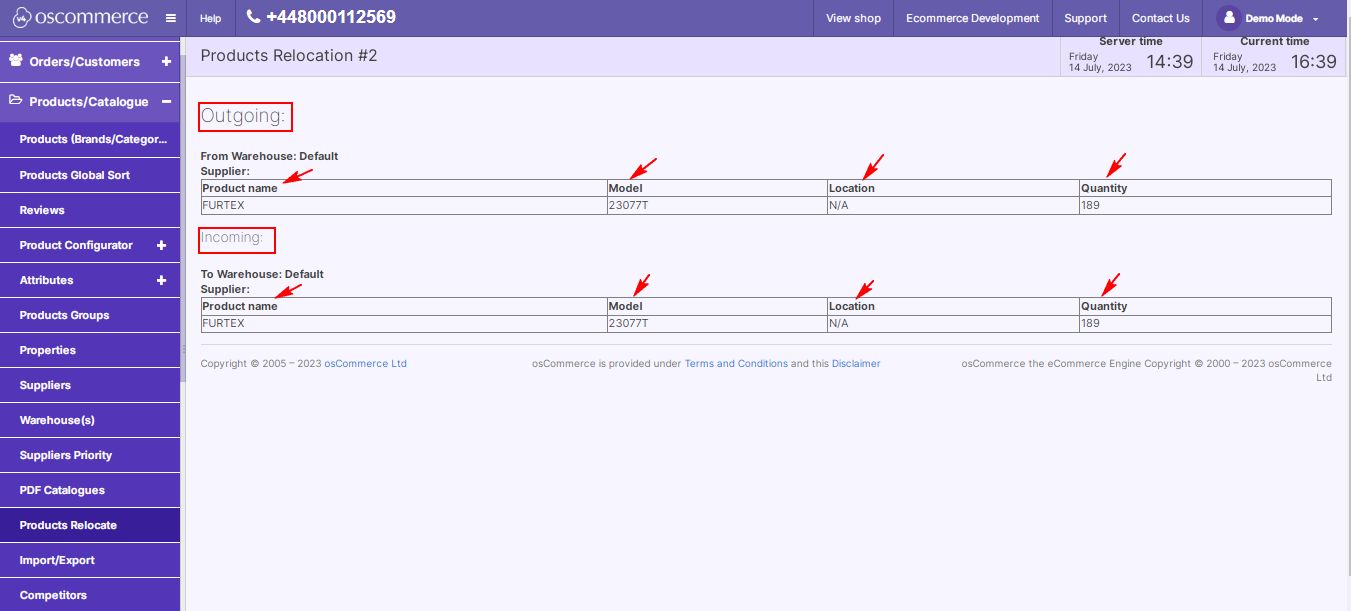
As a result, you have the Products Relocation report which is presented in the form of a table displaying the following information: - Outgoing information block shows from which warehouse the product was relocated with indication of its Name, Model, Location and Quantity. - Incoming information block reports to which warehouse the product was relocated with indication of its Name, Model, Location and Quantity. |
|
|
|
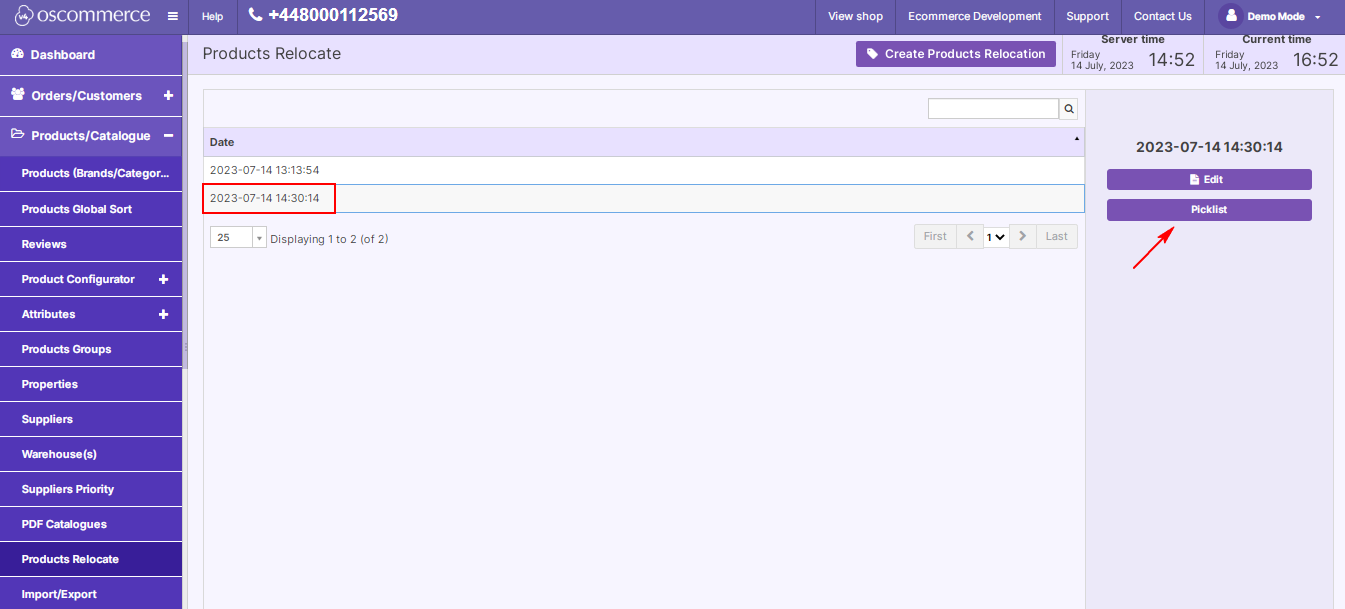
To print the Products Relocation report for comprehensive documentation, click on the Picklist button. |
The Products Relocation report provides insightful details on outgoing and incoming products. If you found this blog helpful, share it with your team and stay tuned for more insightful content. Happy managing, and best of luck with your inventory optimization!


